Building the Custom Seikonaut Homage? Let seikomodder.com assist you with step-by-step instructions for assembling your own unique wristwatch using pre-configured cases. This is particularly beneficial for newcomers, as it necessitates only a limited selection of tools, and these case sets are exceptionally reasonably priced. If you’d like to delve deeper, or need additional information on individual parts of this this guide, follow the links for further details. A review of the products used in this guide follows step by step instructions.
If you are used to modifying stock Seiko watches there will be a few differences to note with the production of this custom watch.
- Dial: The dial for this case is bigger than the standard 28mm – 28.5mm dial typically used for modifying a Seiko. There are many options for this dial.
- Additional movement holder/spacer: Secures the movement into the large case.
How to Guide – The Custom Seikonaut Homage
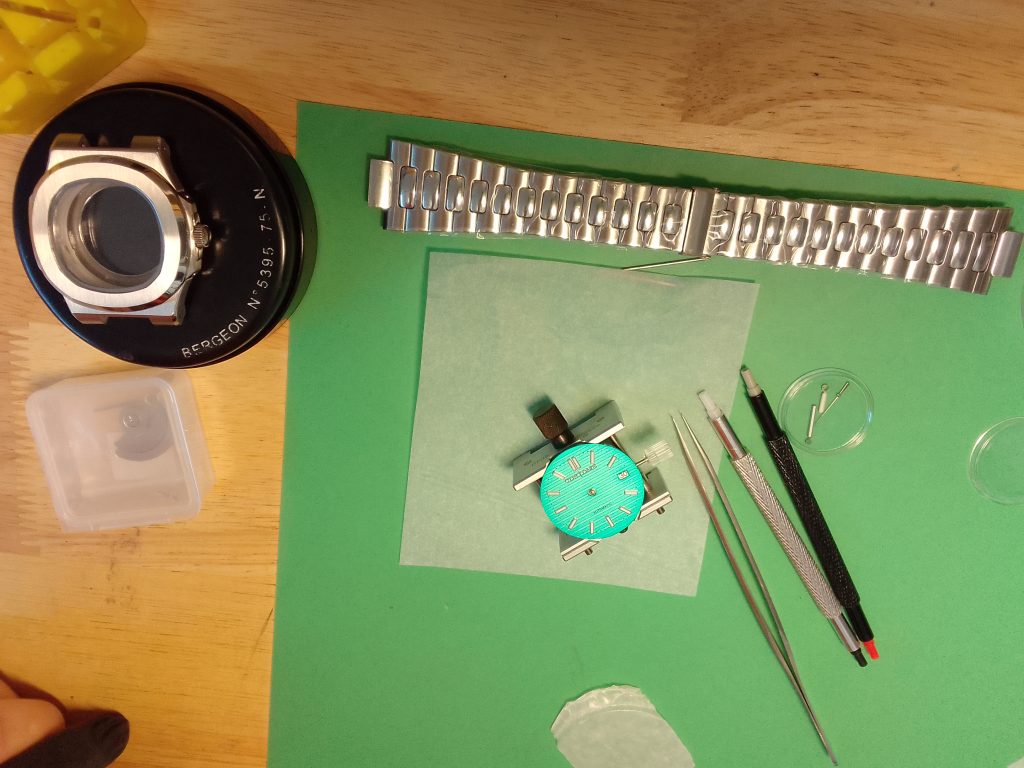
Tools and Consumables
- Case Back Tool
- Pin Pushers
- Hand Press
- Pliers
- Tweezers
- Screwdrivers
- Case Cushion
- Movement Holder
- Air Duster
Optional Tools and Consumables
- Bracelet Vice
- Hammer
- Rodico
- Watchmaker’s Paper
- Storage Containers
- Loctite
- Calipers/Verniers/Ruler
- Rotary Tool or File
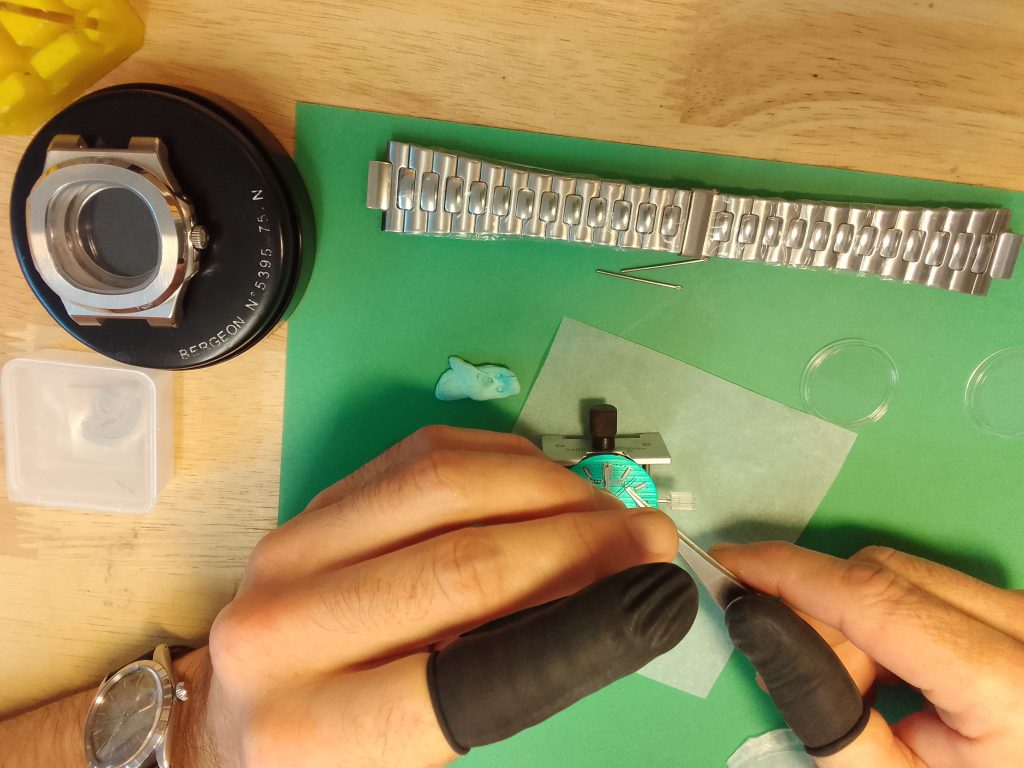
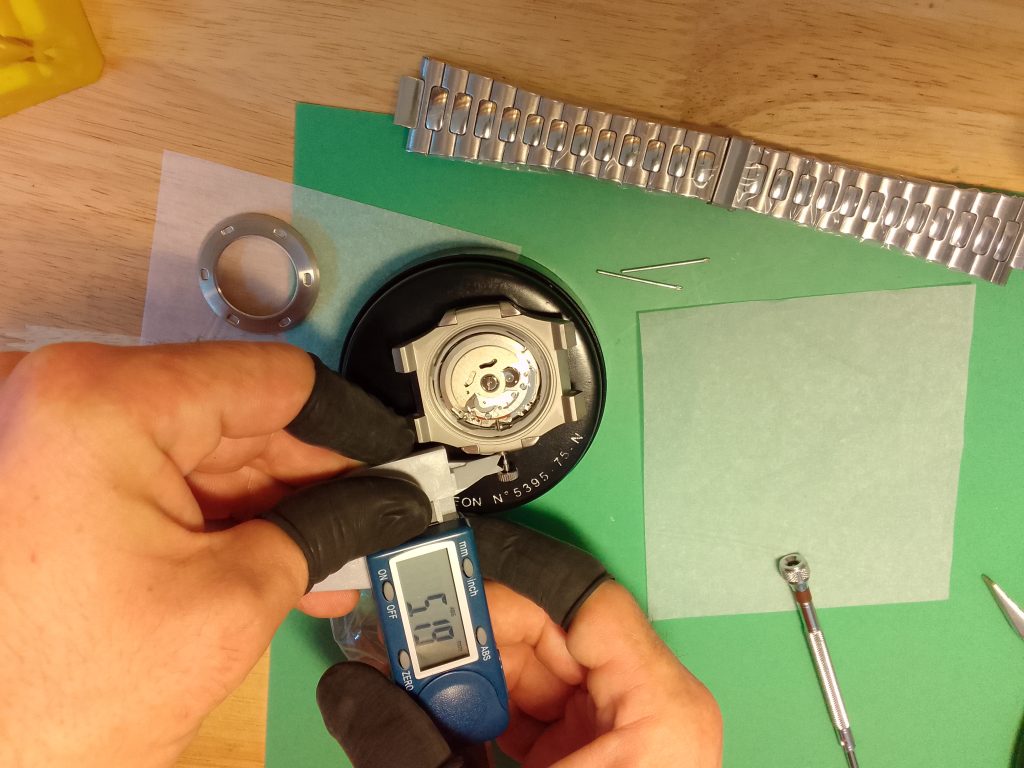
Preparation is key, so getting all the components laid out on the bench or workspace ready is a good idea. These Custom Seikonaut cases come ready assembled with the bracelet fitted, therefore, the first thing to do is remove the bracelet. This particular model has pins that have been pushed into place to retain the bracelet.
Remove the Bracelet – The Custom Seikonaut Homage
If you look at the holes where the bracelet connects with the Nautilus inspired case on the sides of the lugs, you will see that one side has a void, and the other has a pin that has just about been pushed in. To remove the pin, place the pin pusher in the side with the void and push. You may wish to use a hammer to hit the pusher if this pin won’t budge. Once the pin has moved you can remove this if it doesn’t fall out when you move the watch.
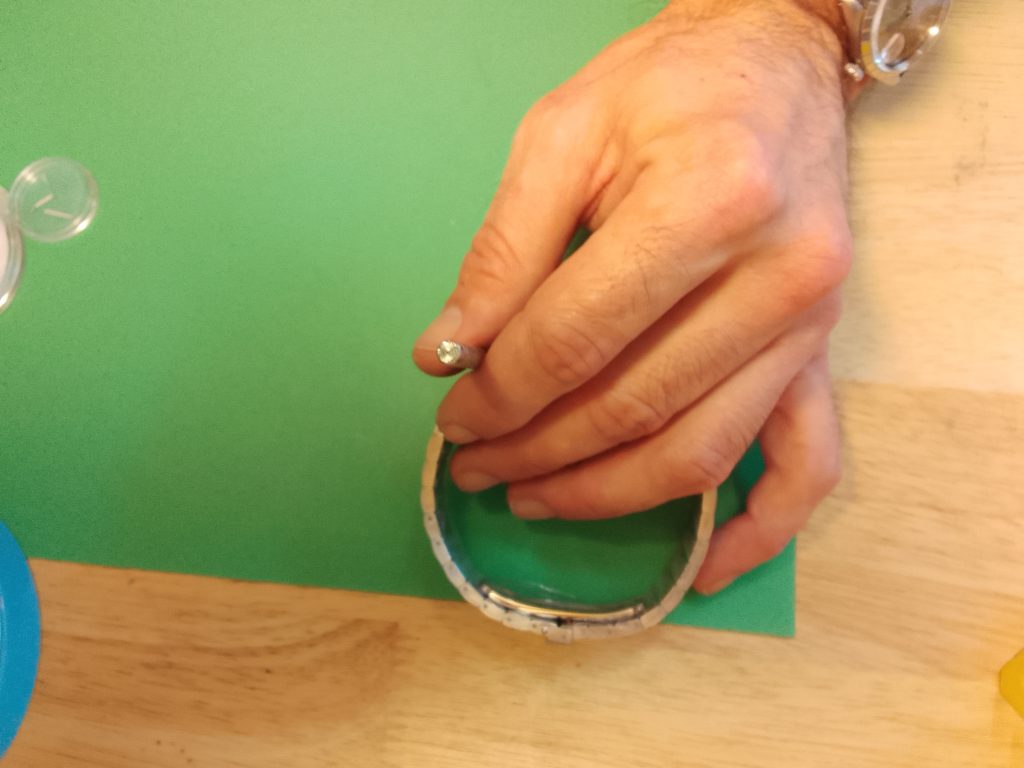

This can be repeated again to remove the remaining side of the bracelet. Check again which side the pin comes out from, although it should be the opposite side to the first pin that was removed. Once complete, store the pins somewhere safe and set the case and bracelet aside.
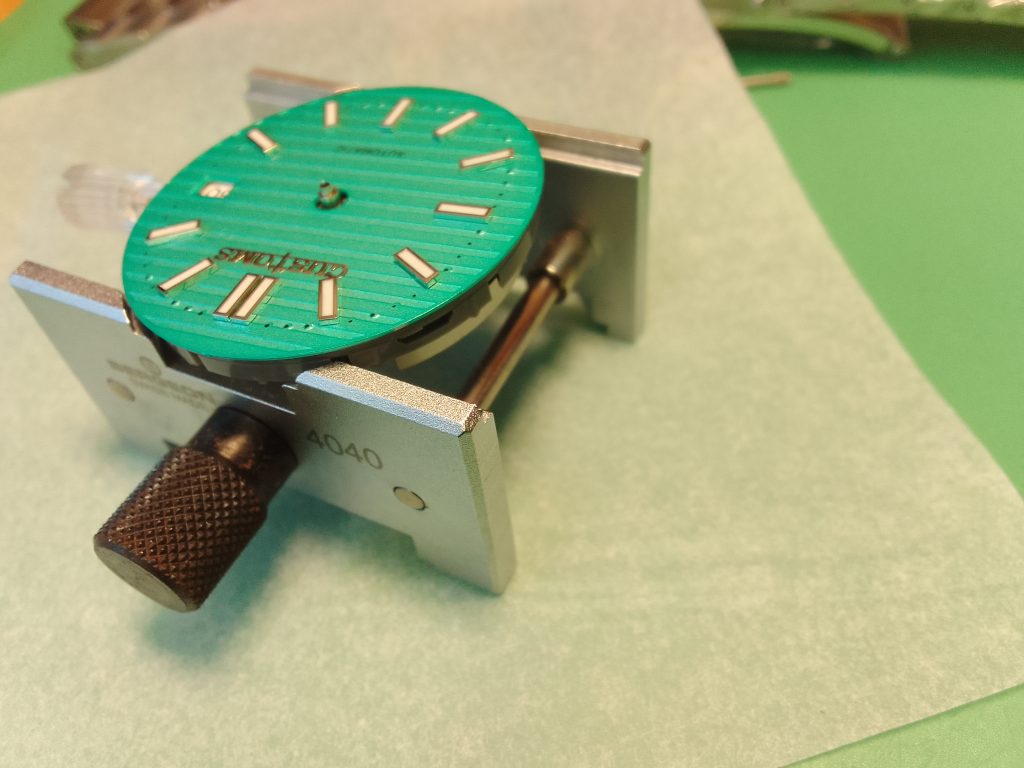
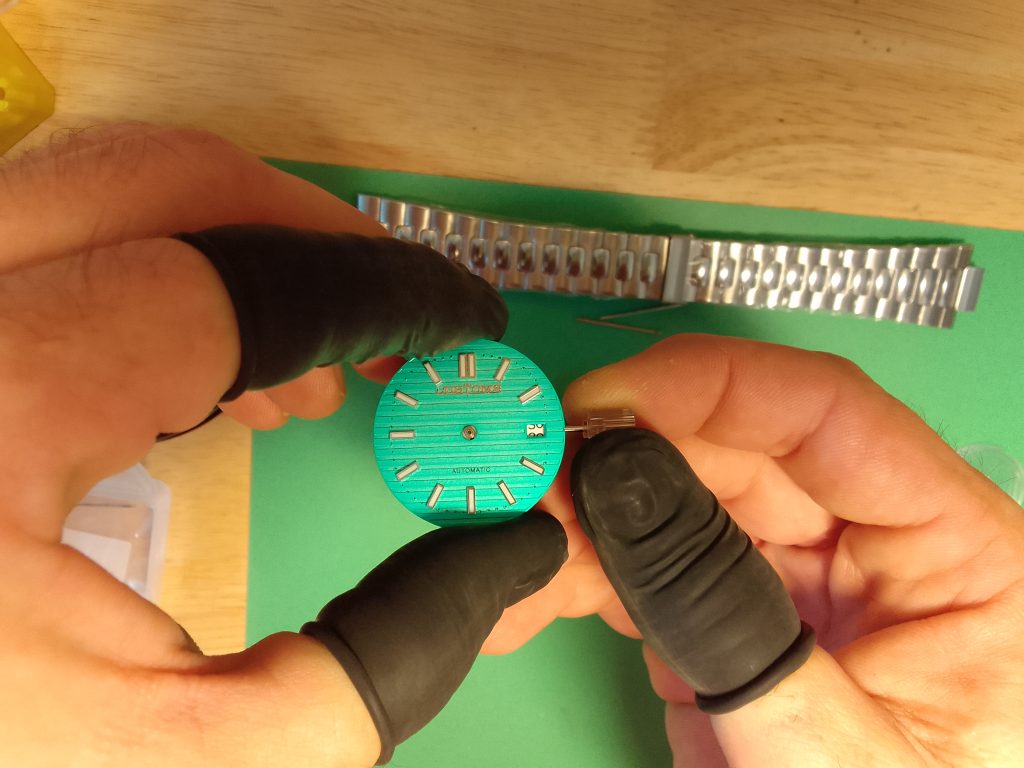
Attaching the Dial – The Custom Nautilus Homage
The dial for this custom watch comes with only two dial feet, suitable for a three o’clock crown. It may be necessary to remove excess dial feet if there are more than required. More information on this can be found in the guide here. This dial is intended to be utilised with this case so the size is perfect.
The movement will need to be in a movement holder. The dial can then be aligned with the crown at the three o’clock position and the centre hole of the dial with the pinion of the movement. With a little wiggle the dial should find the holes in the black or grey movement holder. Once you are confident that the pins are in position, you can apply some pressure down.


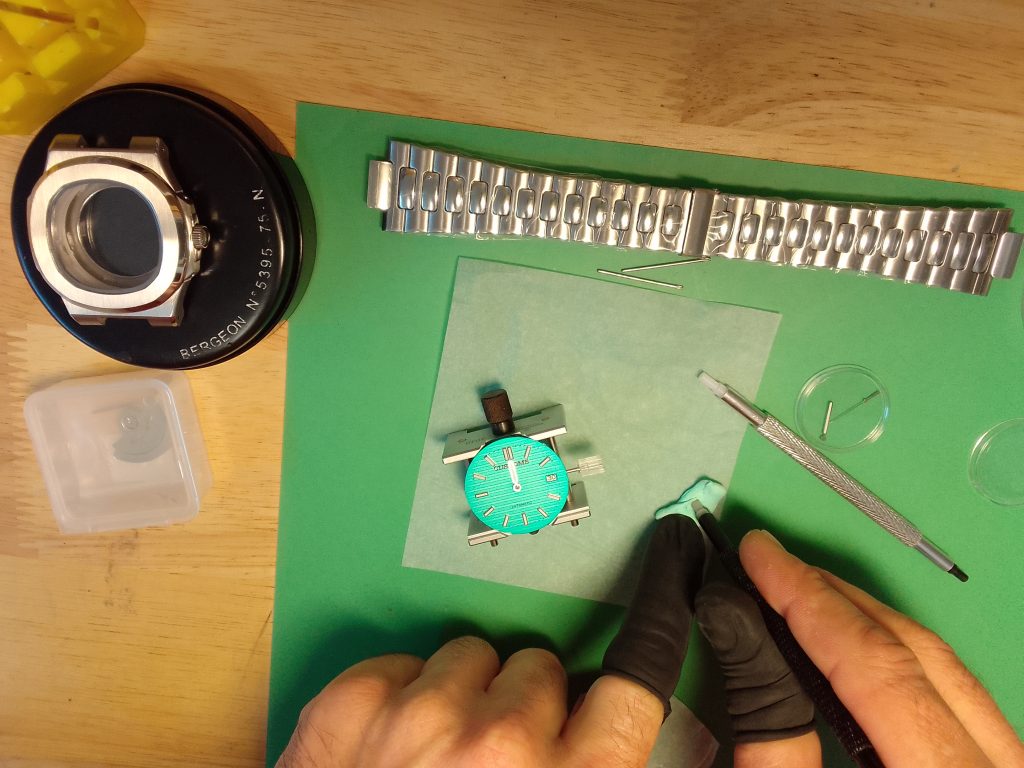
Fitting the Hands
Preparation for fitting the hands can make the job a little easier. Laying out the tools you require will help as you progress to becoming a proficient Seiko modder. This is one of the hardest parts of assembling your custom watch. Seikomodder.com recommends that you practice on an old watch or have a spare set of hands, or two, as you may scratch or bend the hands.
Changing the Date
Most importantly, before you begin the part of the process of fitting the hands, you must wind the time on until the date changes. Stop as close to the ‘click over’ to the next date on the calendar as possible. For more information on this please see the instructions for the NH35 movement located here.
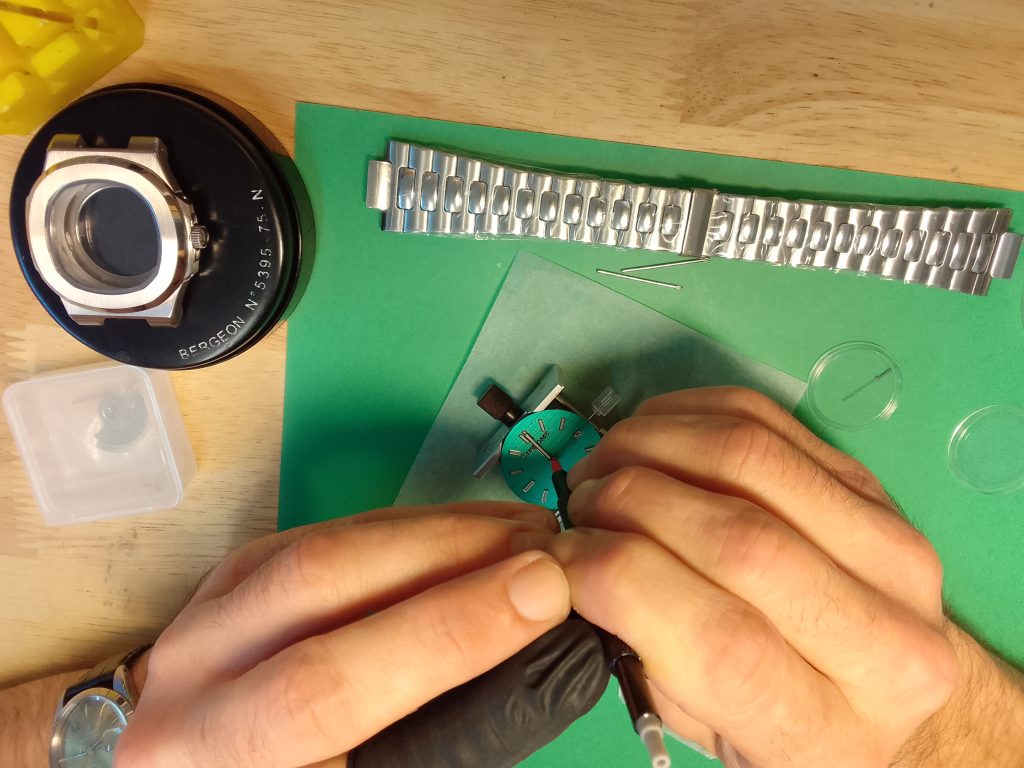
Hour Hand
Placing than hands is done with tweezers. The hour hand first. The direction of the hand should be pointing to twelve o’clock. Once the hand is located on the pinion in the centre of the dial, the tweezers can be removed. Micro adjustments can be made by gently ‘nudging’ the hand with a hand press to get the perfect alignment.
Once this is attached you will need to press the hand into position with the hand press. Before you do, you may want to clean your hand press in some Rodico. Finally, when the hand is pressed into position, assess the side profile, ensuring that the hand is seated parallel to the dial. This will limit the hands fouling after installation.


Minute Hand
The same process is repeated for the minute hand, although you will likely need a different press or dye in your hand press.


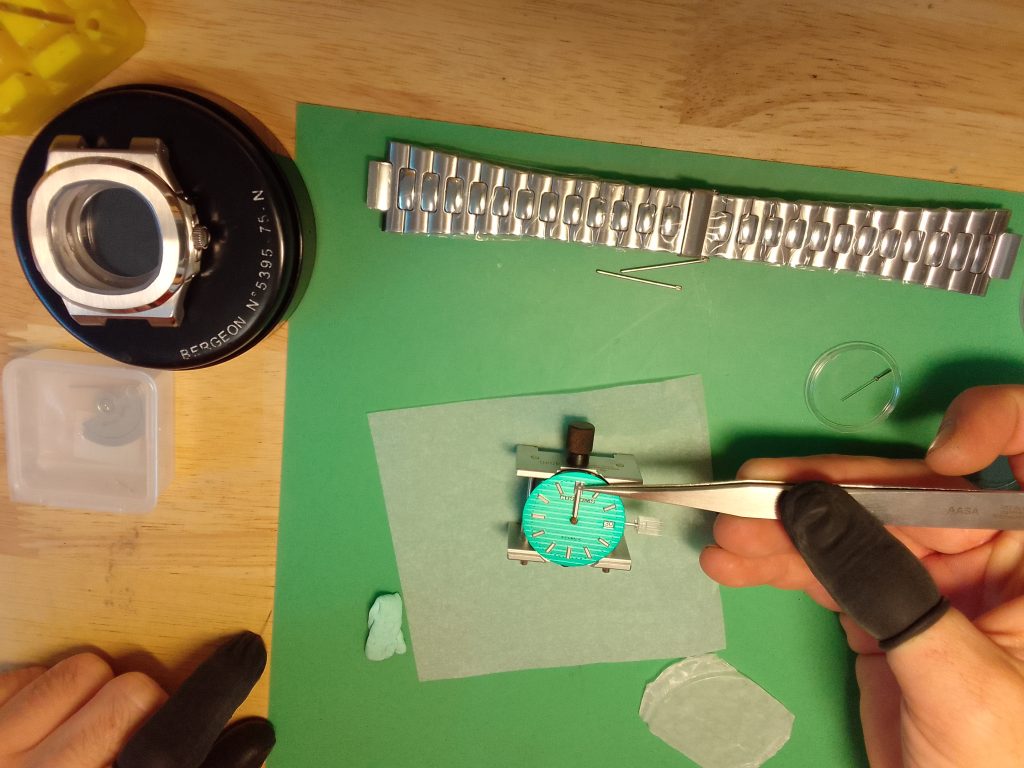

Second Hand
The second hand is the possibly the hardest hand to fit. You may want a use the community tip found on this page. The process is the same, take the hand in the tweezers and position this over the centre pinion. You may need to use Rodico to lift the hand and then take it in hand with the tweezers.


Once the second hand is resting on the pinion this can be pressed into position. Once this is successfully attached, you can check the alignment for the final time.
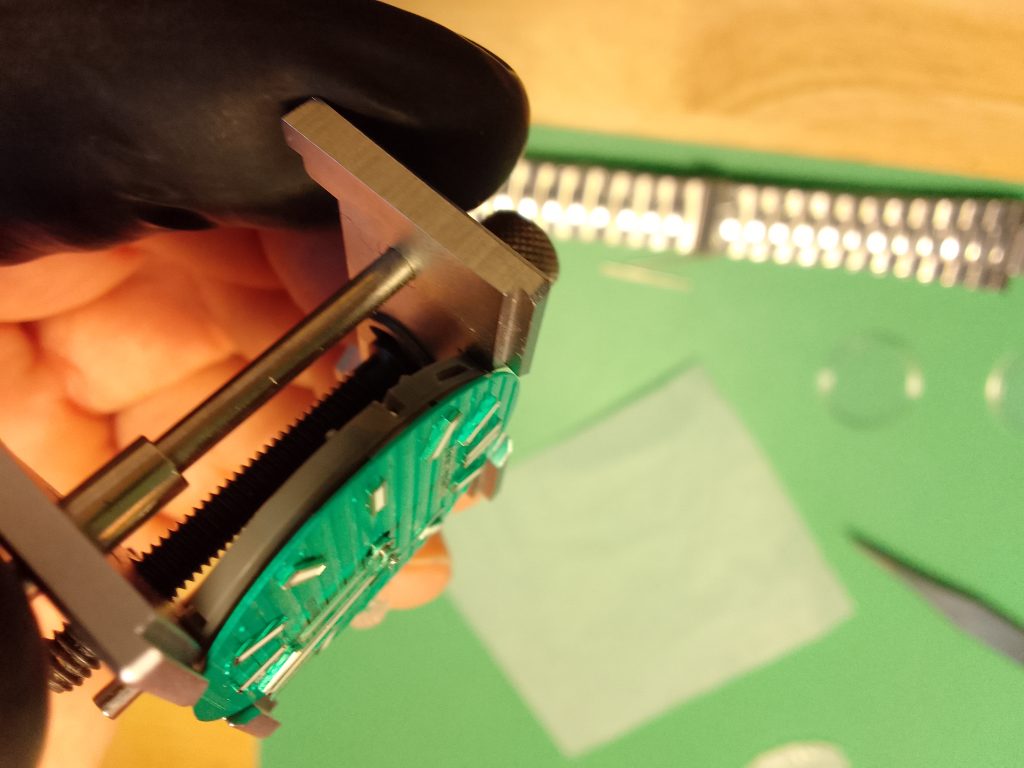
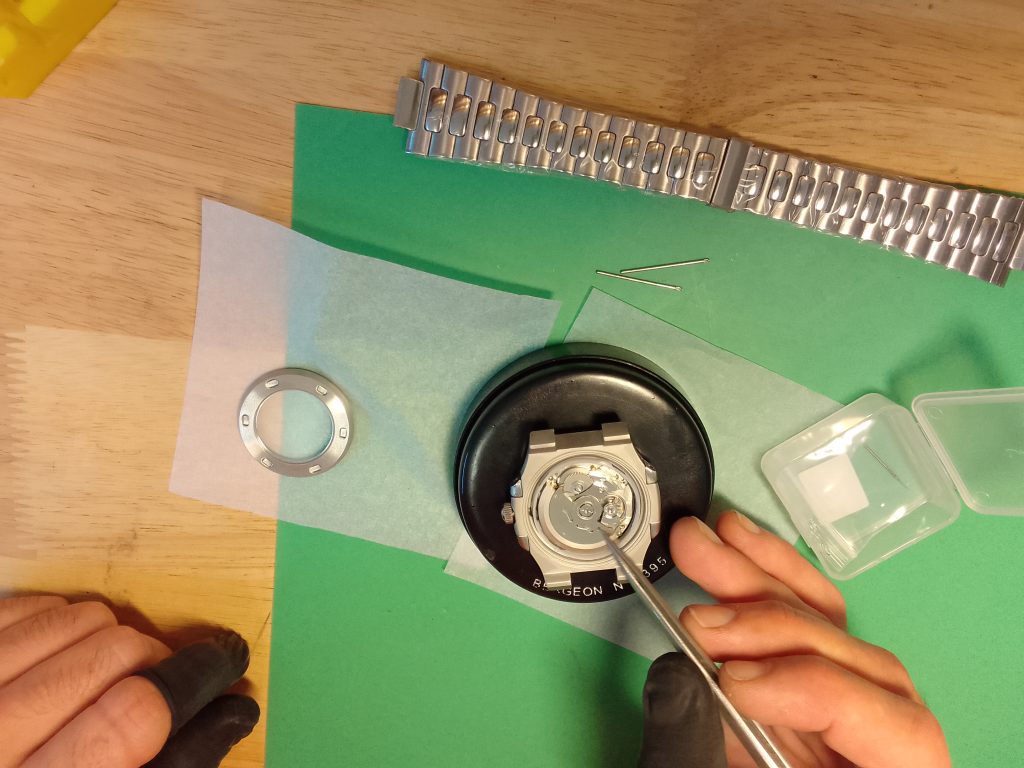
Casing the Movement, Dial and Hands
The temporary crown and stem will need to be removed from the movement so the watch can be cased. Setting the movement in a vice/holder will free up both your hands for this task. Once complete the watch can be set on a case cushion and given a dust off, removing any stubborn particles with Rodico.

The case can be air dusted and inspected. Once satisfied the case and dial are dust free, the case can be laid over the dial, movement and hands. This case’s internal dimensions are bigger than the dial, so it will simply lay over the top. There is an extra spacer to hold everything in place.


Inspect for dust one final time before flipping the watch over on the case cushion.


The additional movement spacer can now be fitted to the rear of the movement. Note that there is a hole cut out for where the crown goes. Position this accordingly. Once in position it can be pressed down to the final resting place.


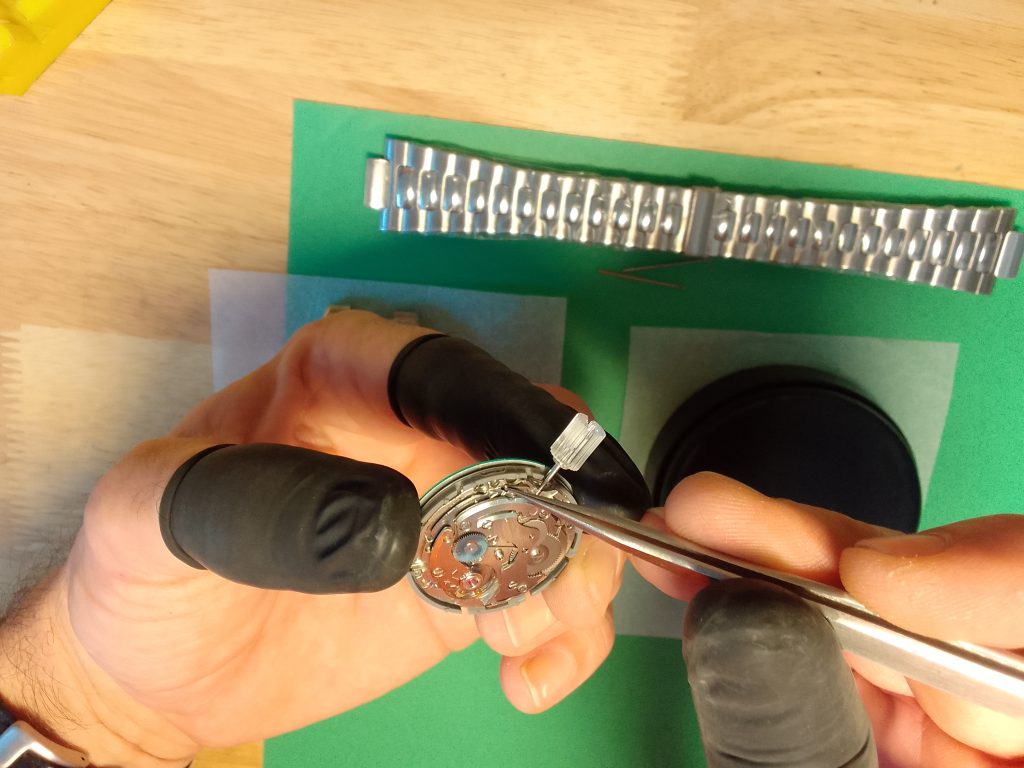
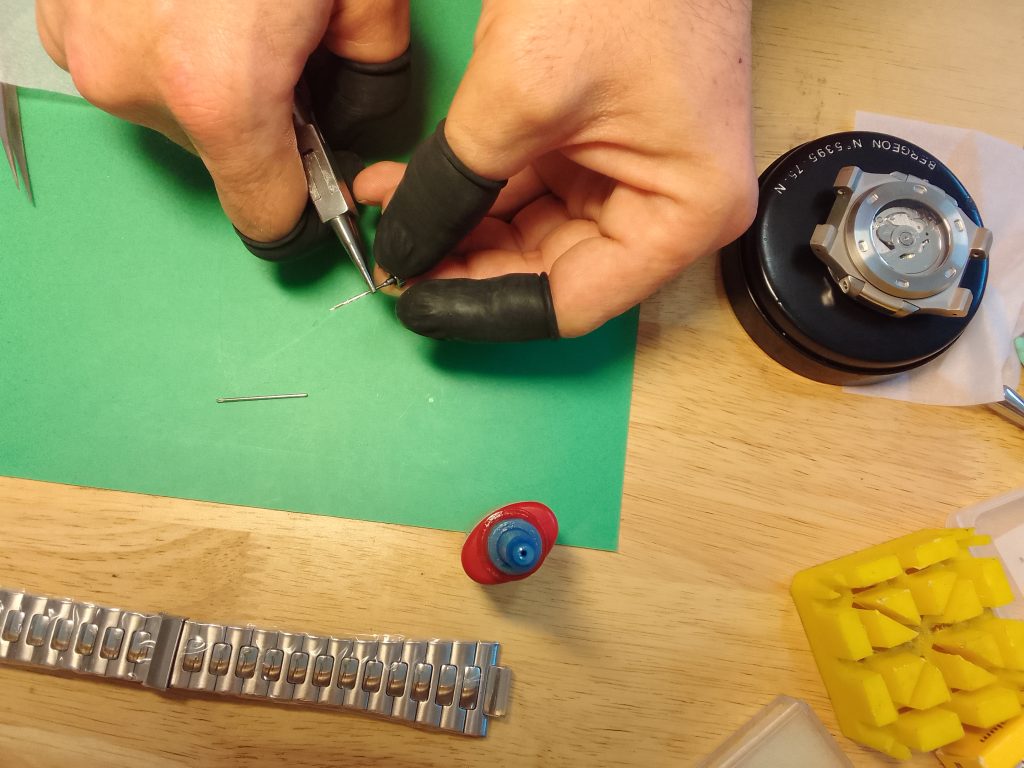
Fitting the Crown and Stem
Attaching the crown to a rather long stem that will certainly need to be cut down. Use pliers to create a firm bond after you have secured this ‘finger tight’.

The stem can be inserted into the movement, this may require a twist to find its way home. The excess can be measured followed by removing the crown and stem.


The stem can be separated from the crown and marked with the length to be removed. This can then be cut and reattached to the stem with loctite, although further testing maybe required to achieve the perfect length stem.


Once the stem is the optimum length, the final fitting can be made and the crown screwed into the water tight position.


Fitting the Rotor
If you removed the rotor, you may wish to replace this now.


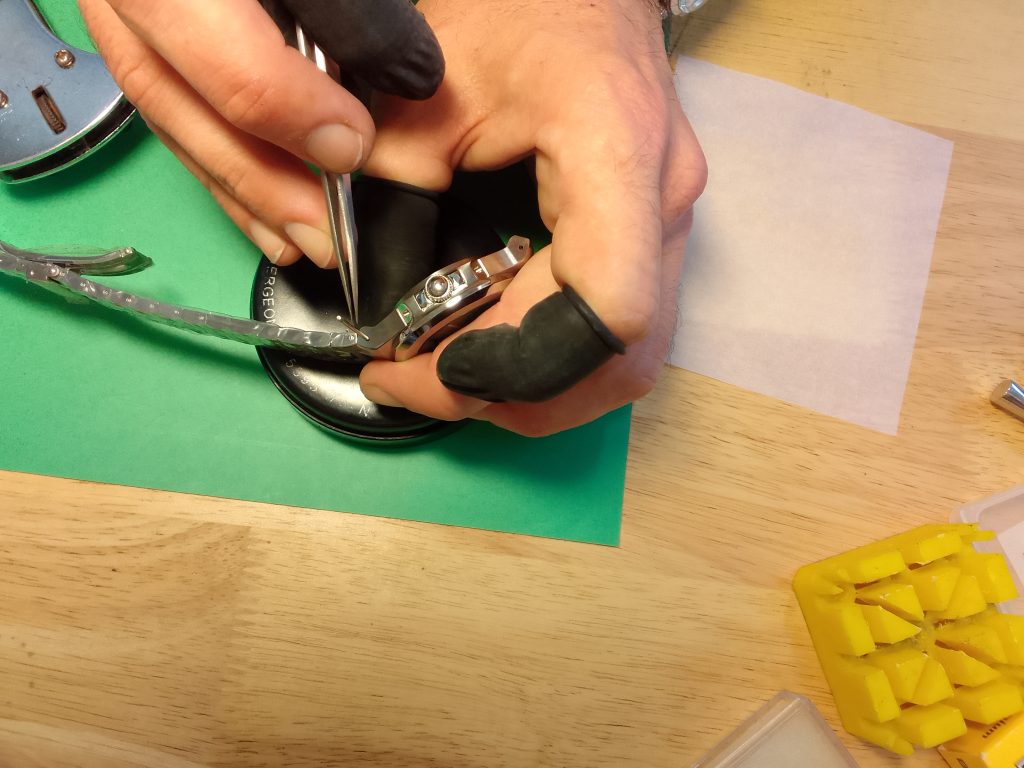
Sealing the Case
There should be a gasket installed on the case back of this case. Check this is in position, if so, fit the case back to the case. This can be finger tightened followed by the final seal with the case back tool.


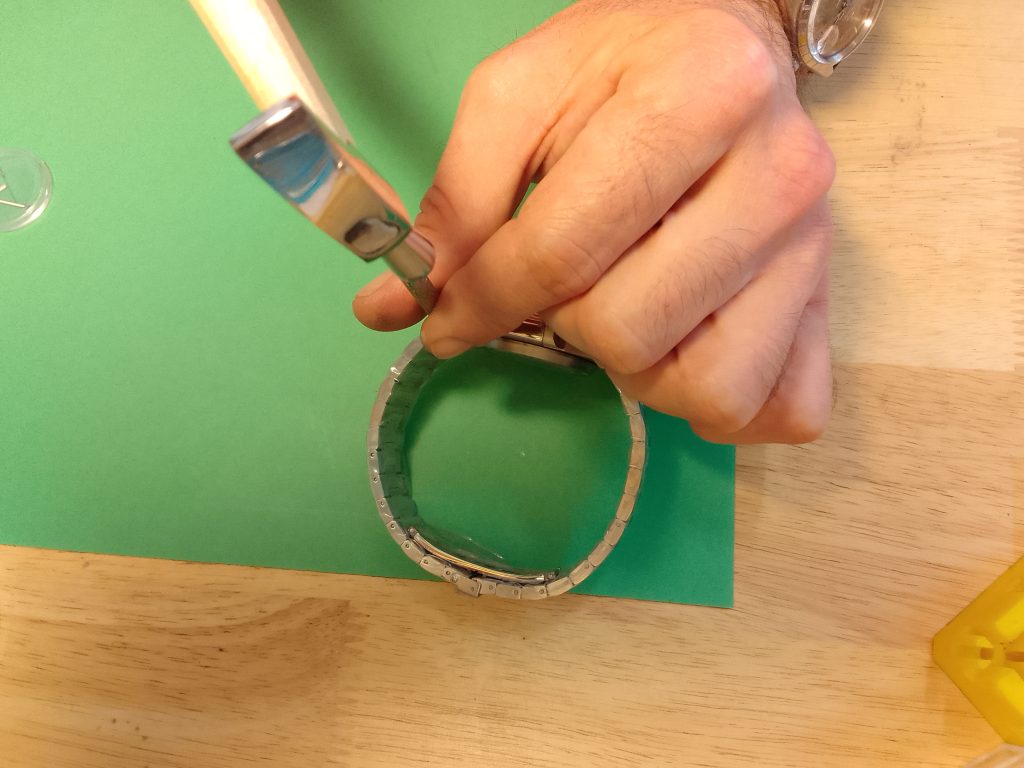
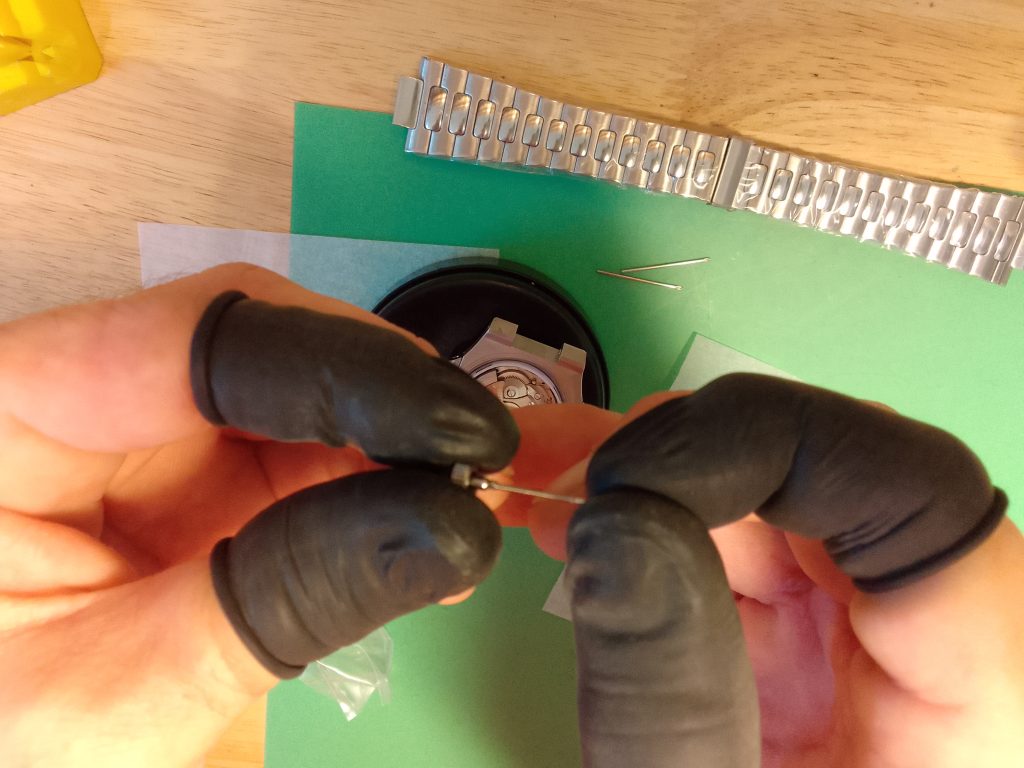
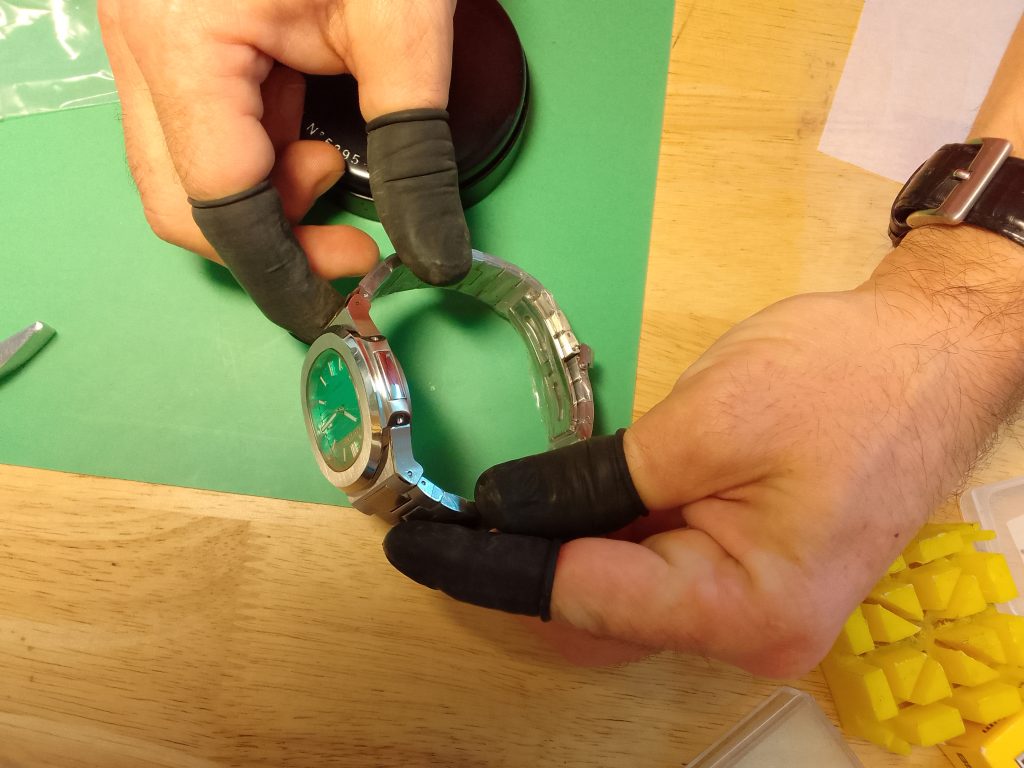
Attaching the Bracelet
The bracelet can be reattached with the two pins that were removed earlier. This can be done by hand and the final tap down undertaken with a pin pusher and hammer, which should achieve a good fitting.


You can inspect both sides of the bracelet for continuity, and now, the watch is ready to wear. If the bracelet needs adjusting this can be done in the same fashion as removing a the bracelet from the watch case.

Case Specifications
- Case material : 316L Stainless steel
- Case back : 316L Stainless steel and sapphire (exhibition)
- Case size : 38mm (44mm with crown)
- Lug to lug : 44.8mm
- Height : 12.3mm
- Bezel : Stainless steel bezel
- Glass : Sapphire crystal
- Water resistance : 100m
- Bracelet: 316L Stainless steel – Butterfly clasp with overlocking
- Require Dial Size: 29.8mm
Review
- Overall Rating: 3/5
While the overall production quality is decent for the price, there are some notable drawbacks that potential buyers should be aware of.
Pros:
- Affordability: The budget watch case and parts are very reasonably priced, making them an attractive option for those who want to try their hand at watch assembly without a significant financial commitment.
- Eye-Catching Luxury Styling: The finished product boasts an eye-catching luxury styling, which is quite impressive considering its price point. It’s a great conversation starter and makes for a unique timepiece.
- Beginner-Friendly: This watch assembly project is relatively easy for newcomers, making it a good entry point for those interested in watchmaking as a hobby.
- Quality of Dial and Hands: The dial and hands on this budget watch are surprisingly good, featuring a clean and well-executed design, making it easy to tell time effectively.
Cons:
- Cheap Bracelet Pins: One noticeable area where cost-cutting is evident is the quality of the bracelet pins. These pins appear to be of subpar quality and may not provide a secure and durable connection between the watch case and bracelet.
- Case Back Quality: The case back is not as smooth as expected when being fastened. This is a significant concern as it may indicate issues with the thread or overall build quality. The risk of the thread breaking when turning the case back too far is a valid concern and may affect the longevity of the watch.
- Lume Quality: The lume, on the watch dial and hands, is not strong or long-lasting. In low-light conditions, the watch may not be as visible as desired, and the lume may fade quickly.
- Doubtful Tool Watch: It’s doubtful that this low-priced homage watch would be suitable as a true “tool watch.” Tool watches are typically designed for durability and reliability in rugged conditions, with features like water resistance and legibility. This watch may not meet those requirements.
In conclusion, the budget watch case and parts offer a fun and visually appealing project for watch enthusiasts on a tight budget, especially for beginners. The dial and hands are of decent quality for the price. However, concerns with bracelet pins, case back quality, and lume performance may affect the watch’s long-term reliability. If you’re looking for a true tool watch, it’s advisable to invest in a higher-quality timepiece with the necessary features and durability.
Buy the same products
The products used in this guide can be found on the following links –
If you’ve found this guide helpful, be sure to explore our collection of other informative guides at seikomodder.com. We offer a wealth of resources to assist you in your modding journey. We’re here to support your passion for watch modification.
0 Comments