A calibre is the mechanism of a watch, the “movement”. A movement is made up of a power source, wheel train, escapement and oscillator. The same calibre or movement is often used for many watches. We will refer to a calibre as a movement in this guide as this is the term most used amongst the modding community. Seiko have a long history of creating movements. The first Japanese wristwatch was made by Kintaro Hattori 1913 the Laurel. He was the founder of the Seikosha factory which roughly translates to House of Precision this later became the Seiko Brand.
Seikos are great watches and unlike many of your favourite Swiss brands, which use a stock ETA, Valjoux or Unitas movement, these being the most popular. These movements are often refined and marked by the manufacturer. These manufacturers didn’t design the movement, they just refined it and put a case on it. Seiko have not sourced a movement suitable for their watch design or designed a watch around another’s movement. They have continued to design and produce these themselves. This is a really nice thing, and when we look to the market is it hard to find another manufacturer offering this at the price point of Seiko. Seiko have produced many wonderful calibres, the ones we will be concentrating on for modding in this guide are as follows, and fall within the 7S family.
The 7S family is made up of the following movements. Those released after 1996 have been developed to include manual winding and what is know as second hacking, or stopping the second hand.
| Group | Year Introduced | Movements | Hacking/Hand-winding |
| 7S | 1996 | Seiko 7S25, 7S26, 7S35, 7S36, 7S55 ABC Hattori Models | No |
| 6R1X | 2006 | 6R15, 6R20, 6R21, 6R24 Hattori Models | Yes |
| 4R3X | 2011 | 4R35, 4R36, 4R37, 4R38, 4R39 Hattori Models NH35, NH36, NH38 | Yes |
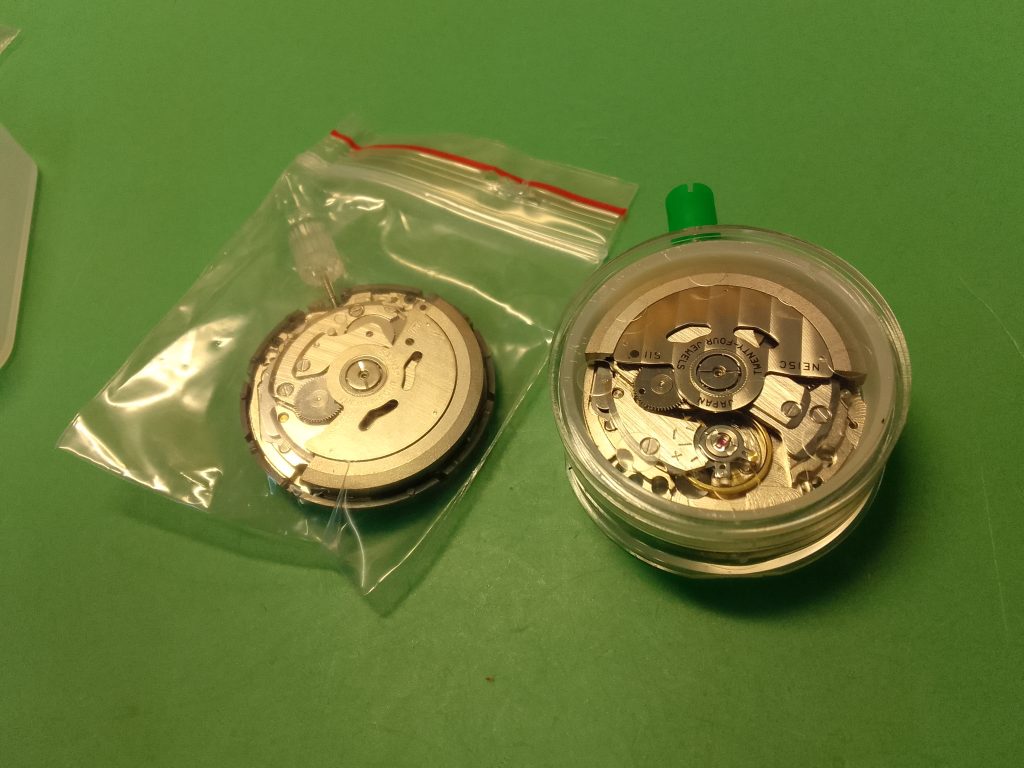
Photo movement 4R36 6R15 7S26 etc
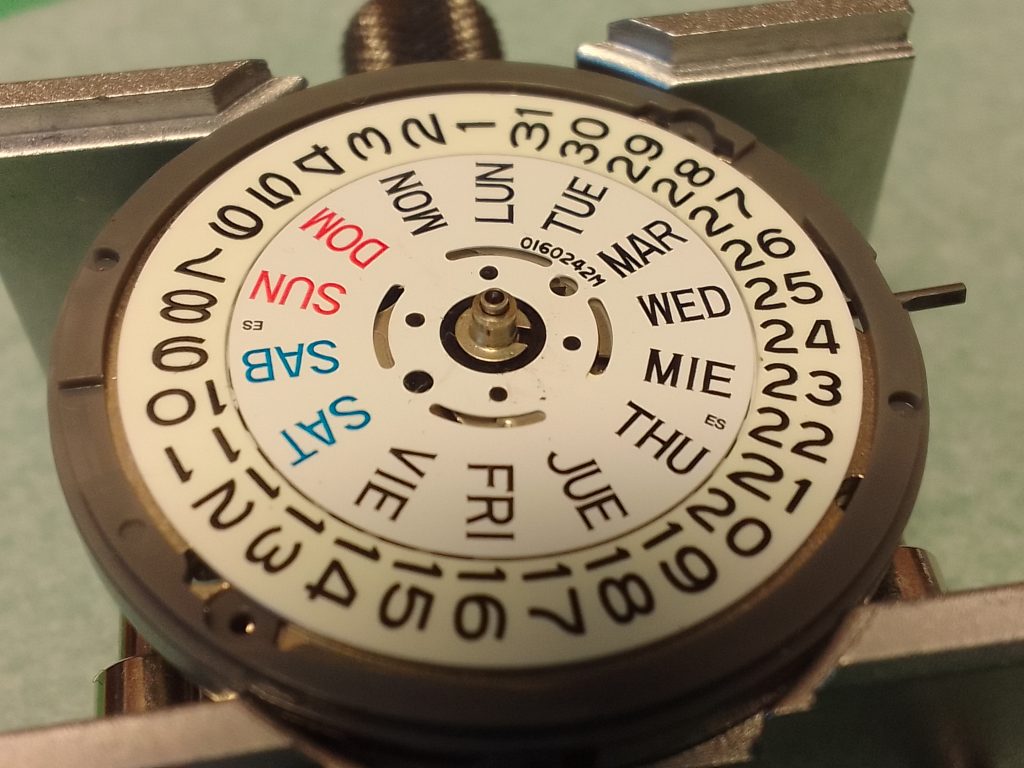
As discussed earlier regarding the number on your case there are three versions of the Seiko day/date 7S26, A, B & C
Suitable movement for modding.
Case Fitting
As we have already discussed, the 5KX (SPRD) comes with the Seiko 4R36 which is essentially an upgraded 7S26 to include the features in the table above. There is no difference in these movements when it comes to fitting them into an SKX or 5KX. The SKX movement holder measures 4mm in height, while the SPRD only 3mm. The latter is the standard size movement holder that will be shipped if you were to order these movements from distribution. Typically Seiko 7S, 4R etc. movements are supplied with a black movement holder, and the NH models with grey.
If you are upgrading the Seiko SKX to a 4R36 you need to take the original movement holder from the 7S26, and place this on the 4R36. In addition you will need to change the date wheel so that this lines up with the day/date window on the dial. No matter whether you are upgrading a 7S26 in an SKX to a 4R36, or replacing a broken movement in the SRPD you will need to change the day wheel, so this guide is for both.
Movement Swap
Tools and Consumables
- Blade/Screwdriver Red (120), Grey (160), Brown (3.00)
- Tweezers
- Rodico
- A Selection of Pots for Storage
- Movement Holder, or two
- Rubber Gloves or Finger Cots
- Anti-Static Matt
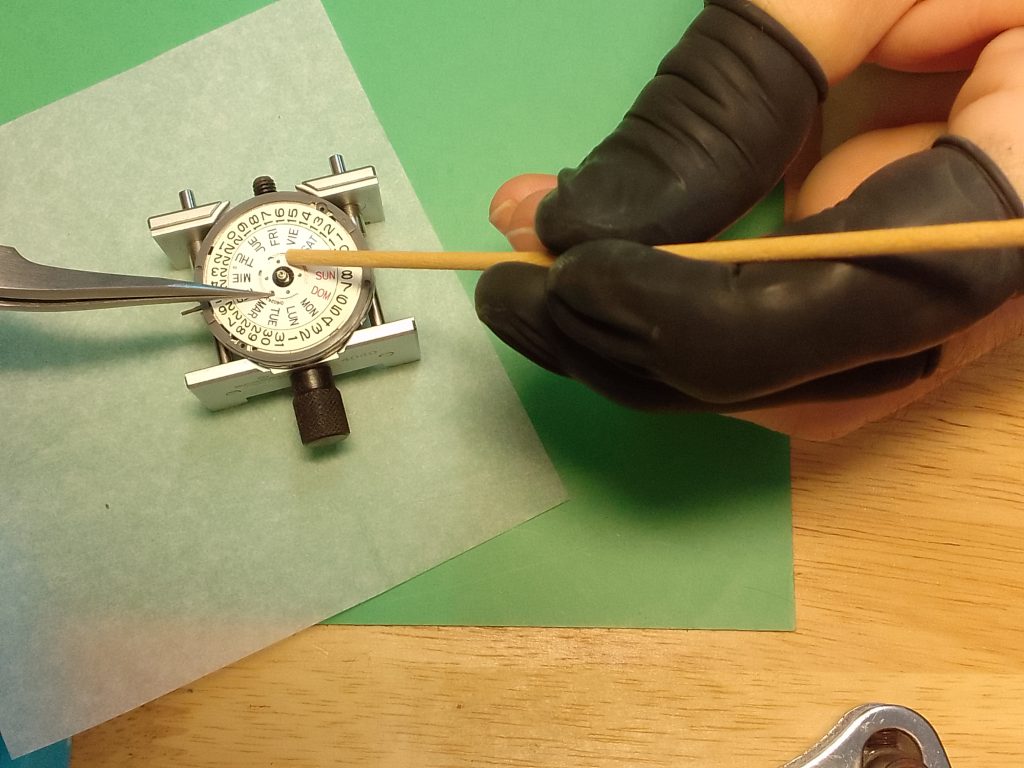
- Pegwood
You have your new movement probably in a plastic case of some kind. The stem is hidden away in there somewhere so don’t loose that. Finally there is a disposable stem with operational crown. Don’t remove this until the process is complete it, it will cause you some problems further down the line if you do, making this relatively simple process more work.
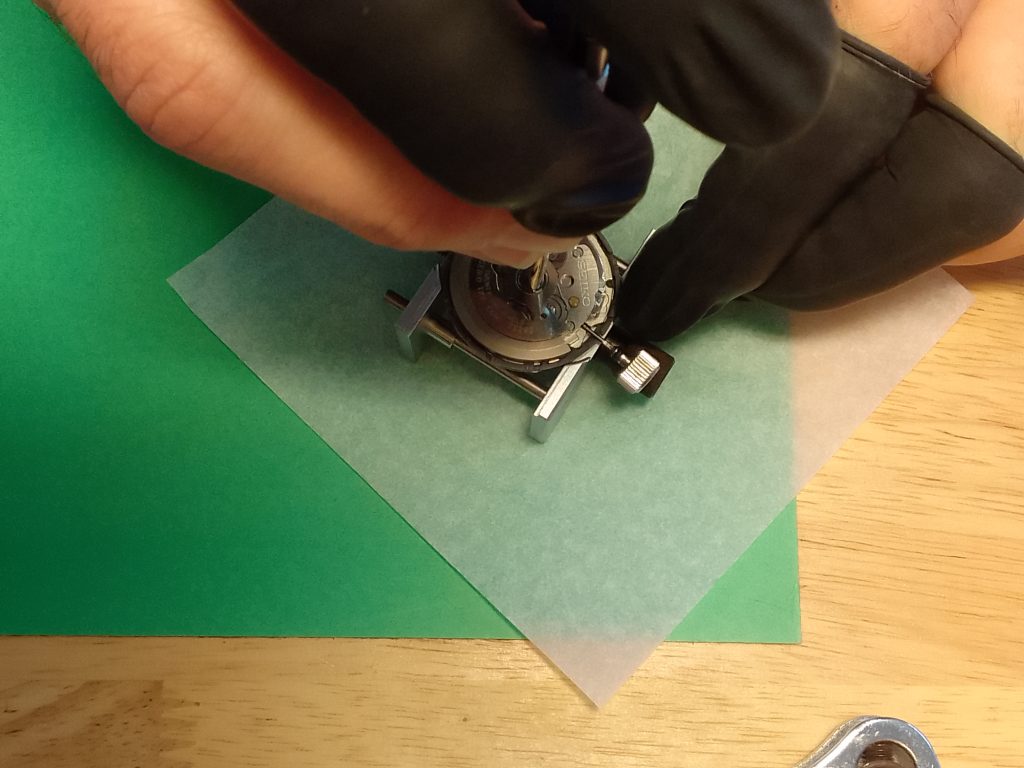
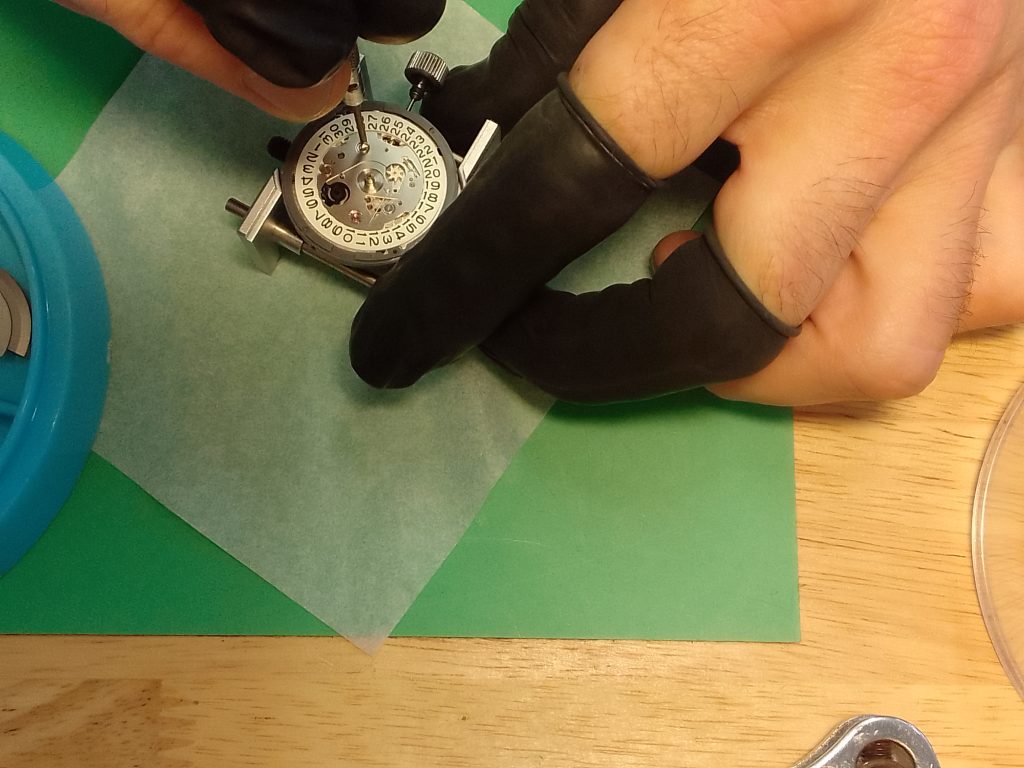
Hopefully you have rubber gloves on to unpack the movement. First of all we are going to place the movement day/date facing down and tighten the movement holder, so it has a firm grip on the plastic movement holder.
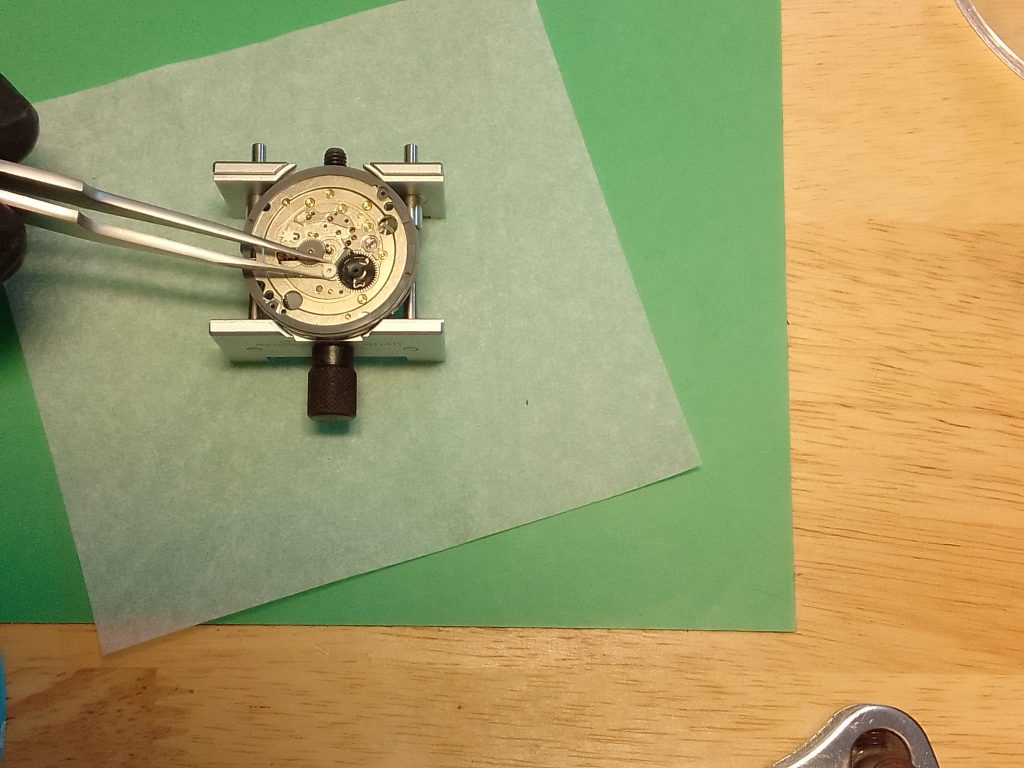
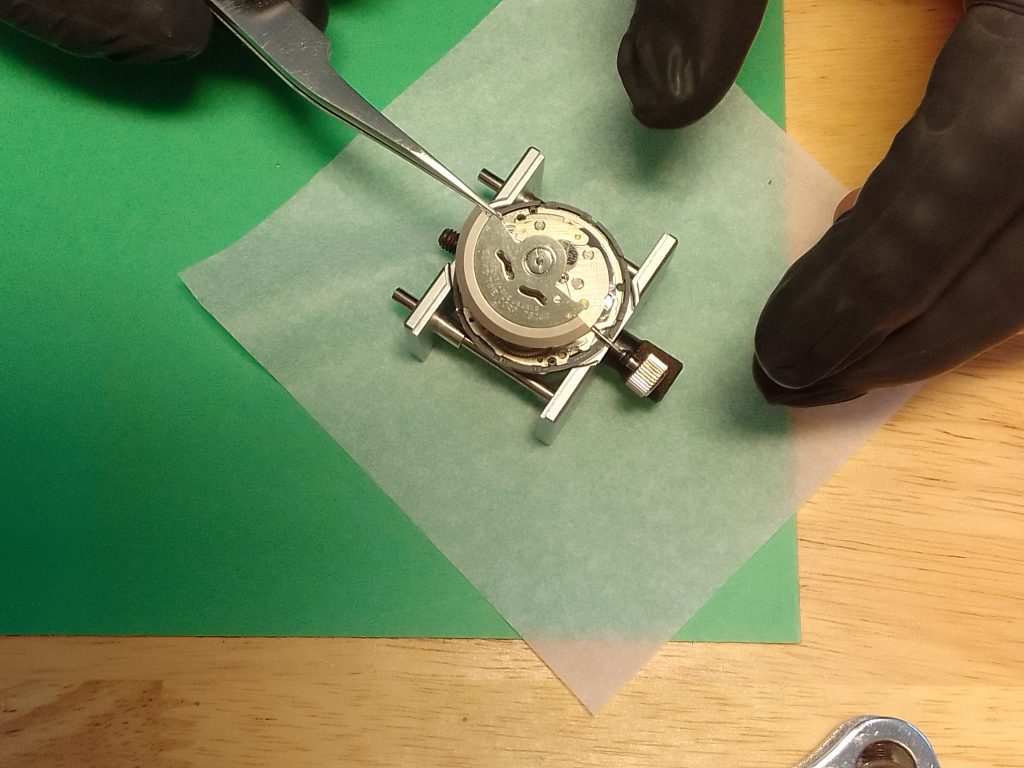
Removing the Rotor
You may need the brown 3mm screwdriver to remove the oscillating weight, also known as the rotor. Hold the movement holder in your free hand and use the screwdriver to remove the rotor. The rotor has a thread, like a nut. This is located directly in the centre of the movement, there is a space for your screwdriver either side. Position your screwdriver as central as you can and turn. Remember “lefty loosy, righty tighty!”
While you are unscrewing the rotor you will notice it is making its up the thread towards you. You will know when you have sufficiently turned your screwdriver enough times as the rotor will drop to the weighted side when you remove your screwdriver from the centre of the rotor.
Your tweezers can now be used to remove the rotor and store it in a dust proof pot.

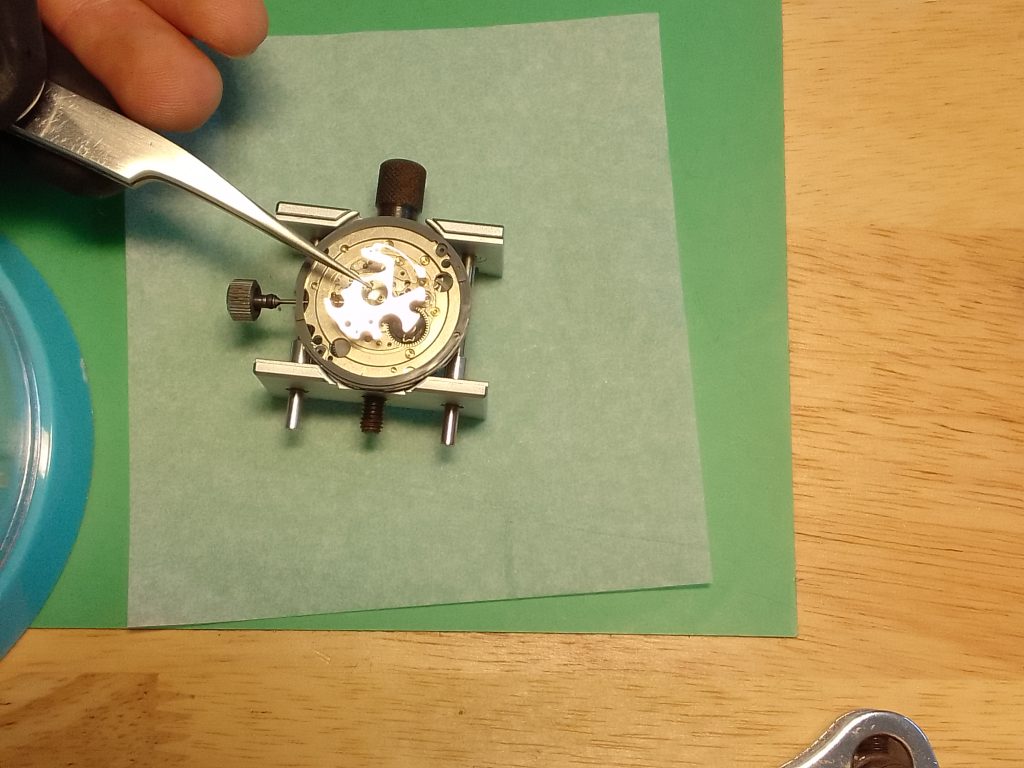
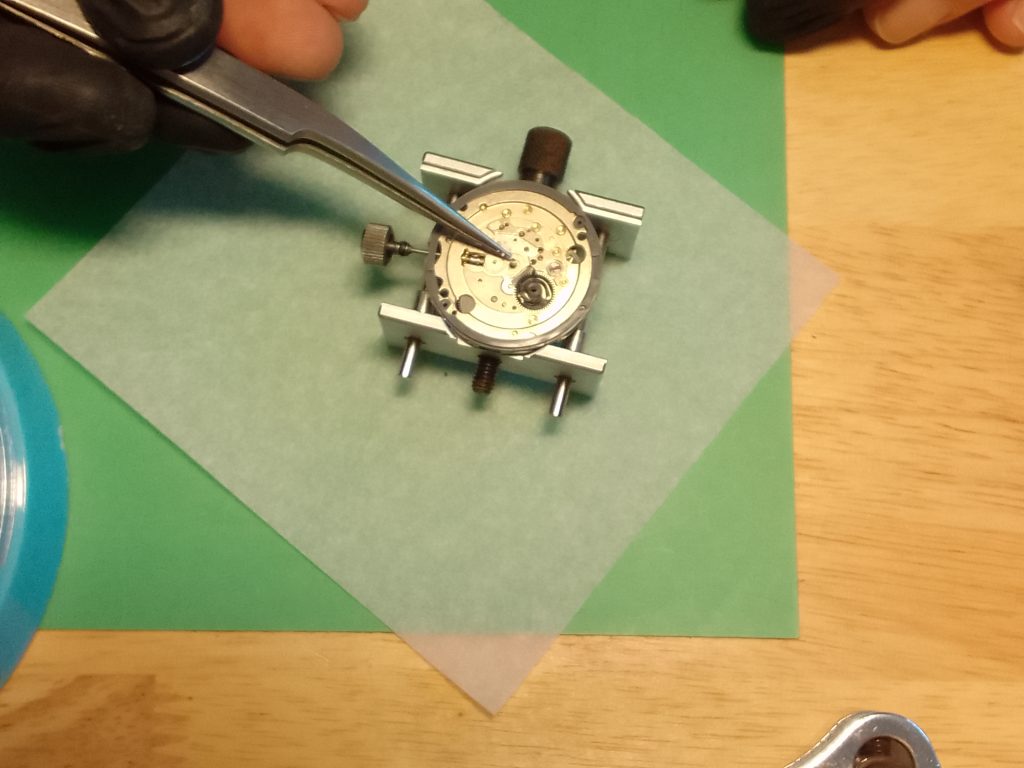
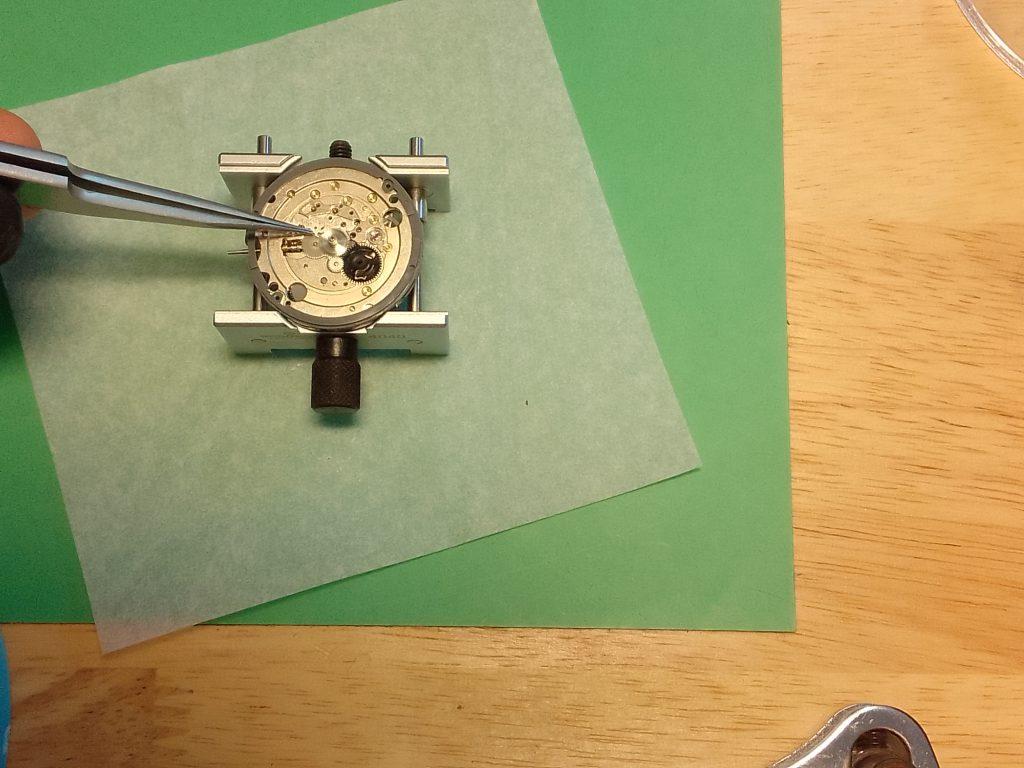
Removing the Clip
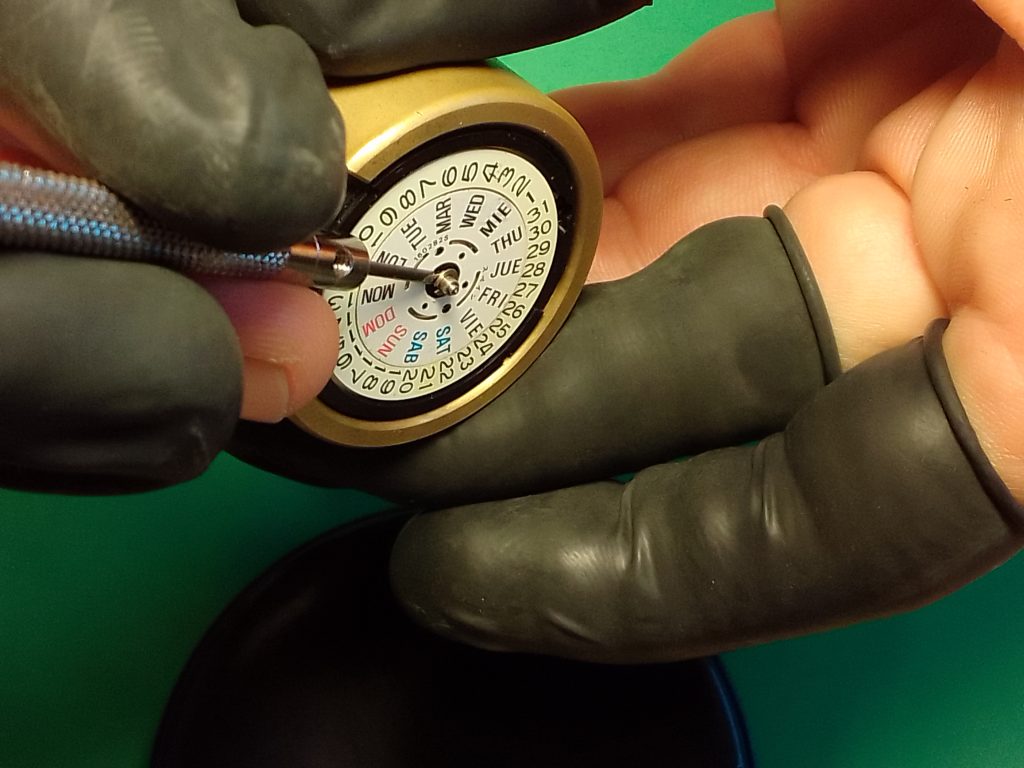
The movement can now be turned over so that the day and date wheels are facing up. Tighten the holder again.

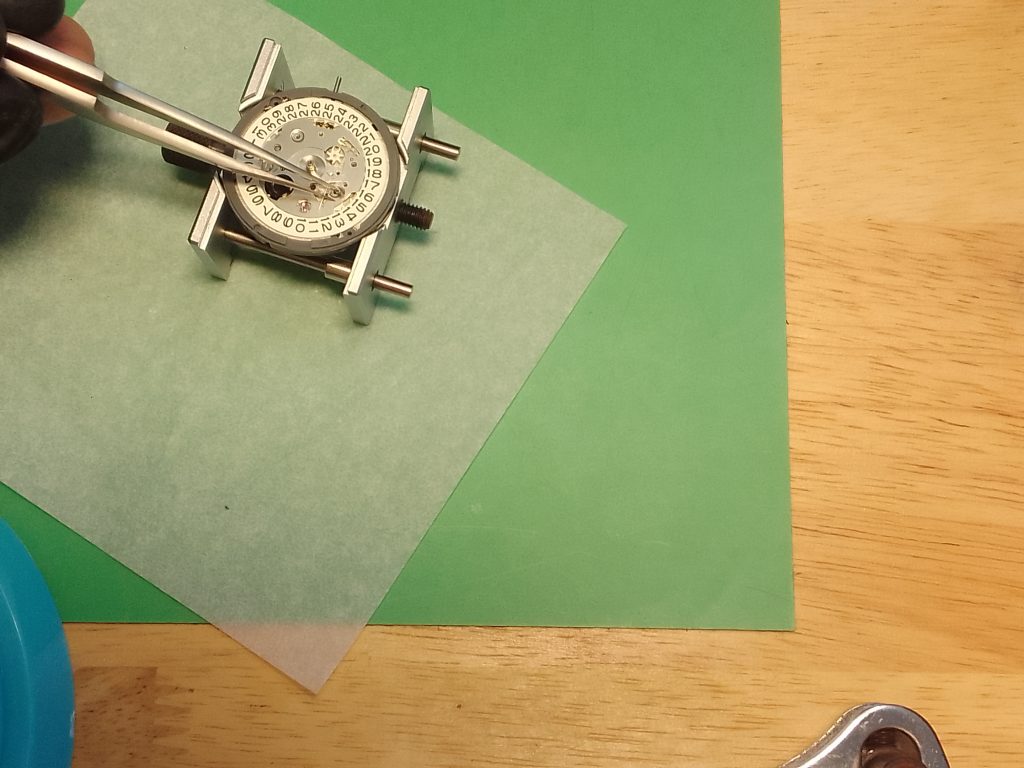
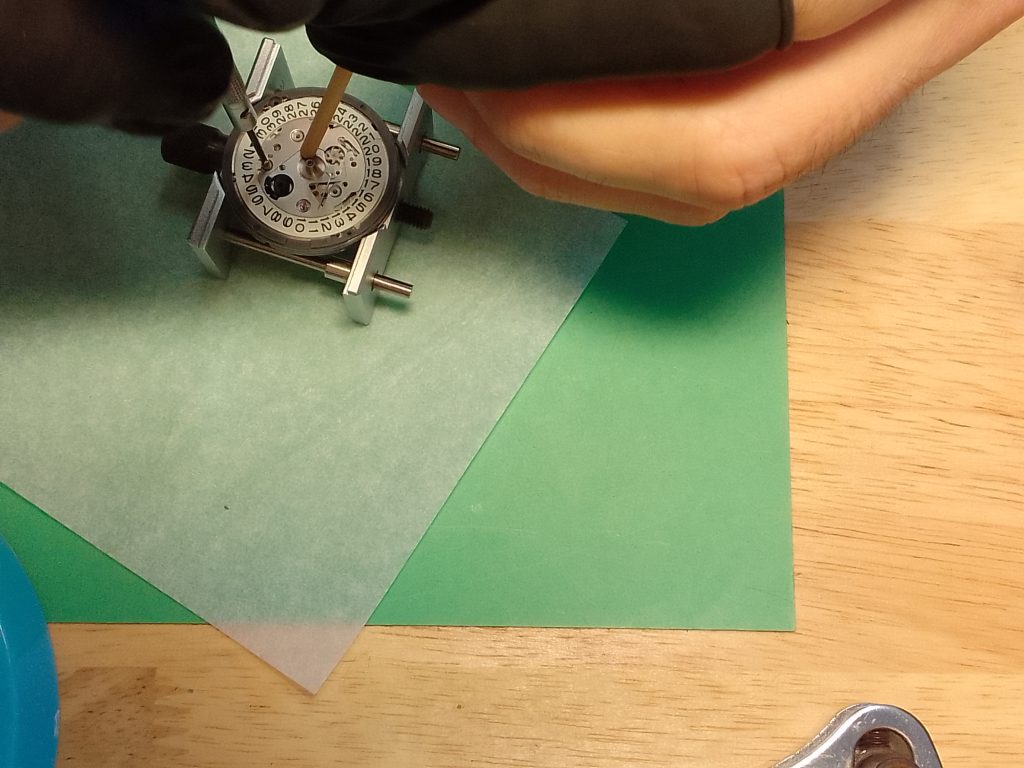
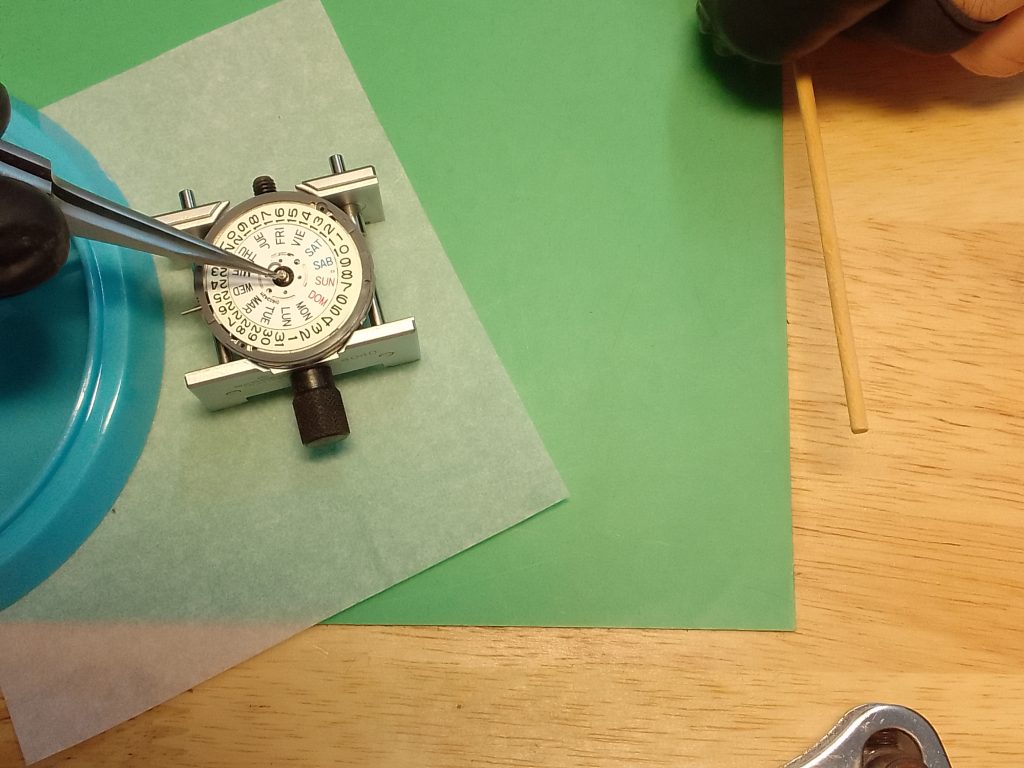
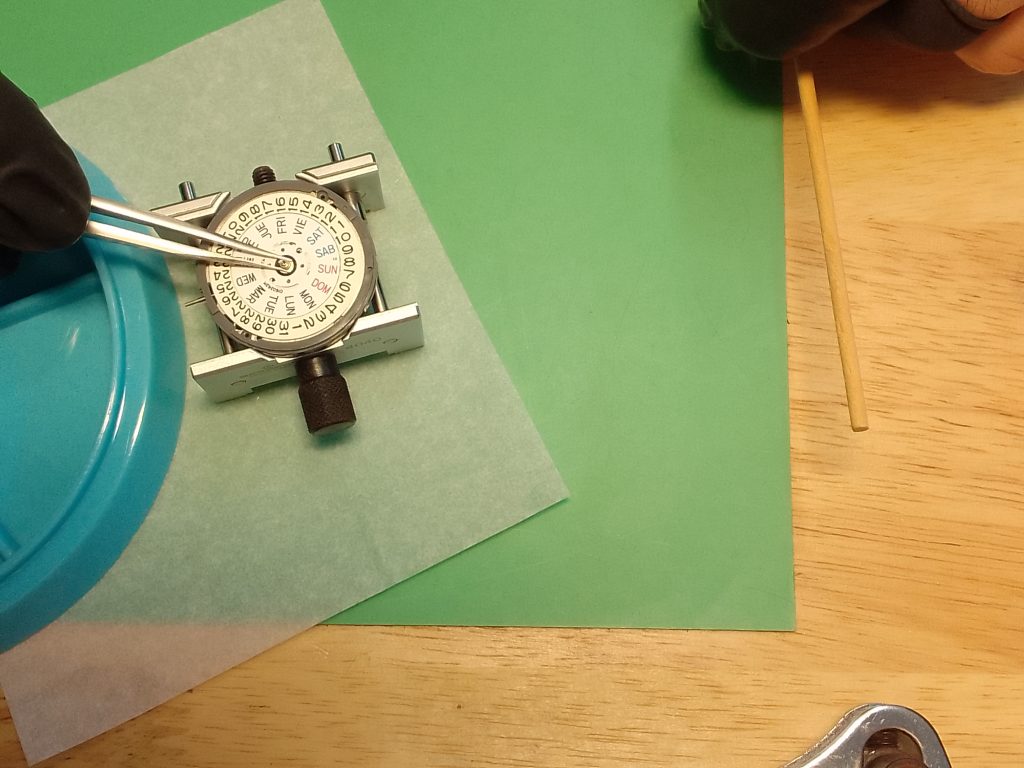
We can now begin to disassemble the calender works. The first thing to be removed is the ‘snap’ a sort of circlip that is around the hour pinion in the centre of the watch (where you mount the hands).
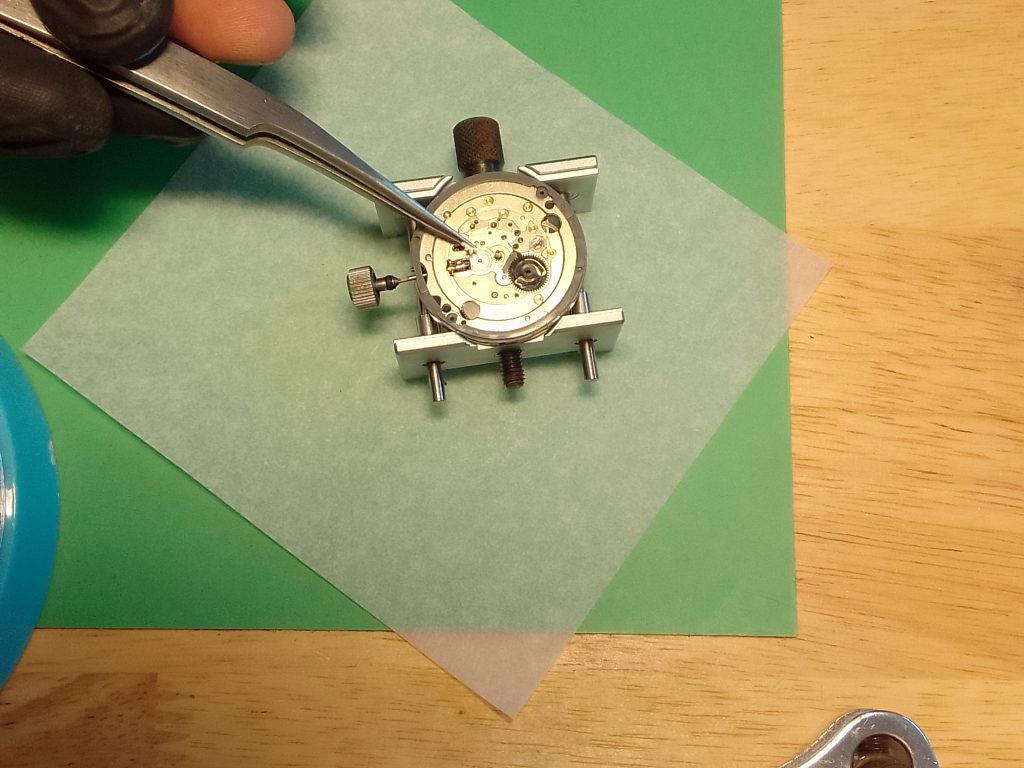
To do this, locate the opening of the snap. Use a red 1.20mm screwdriver for this as it’s the ideal size. Lay it flat on the date wheel at the opening. Push the screwdriver gently under the circlip, you can work it up a little once you are successfully underneath it. Don’t lift it too much, it may fly off. If you now carefully work around the pinion, the clip will reach a height where it can be removed with a pair of tweezers.
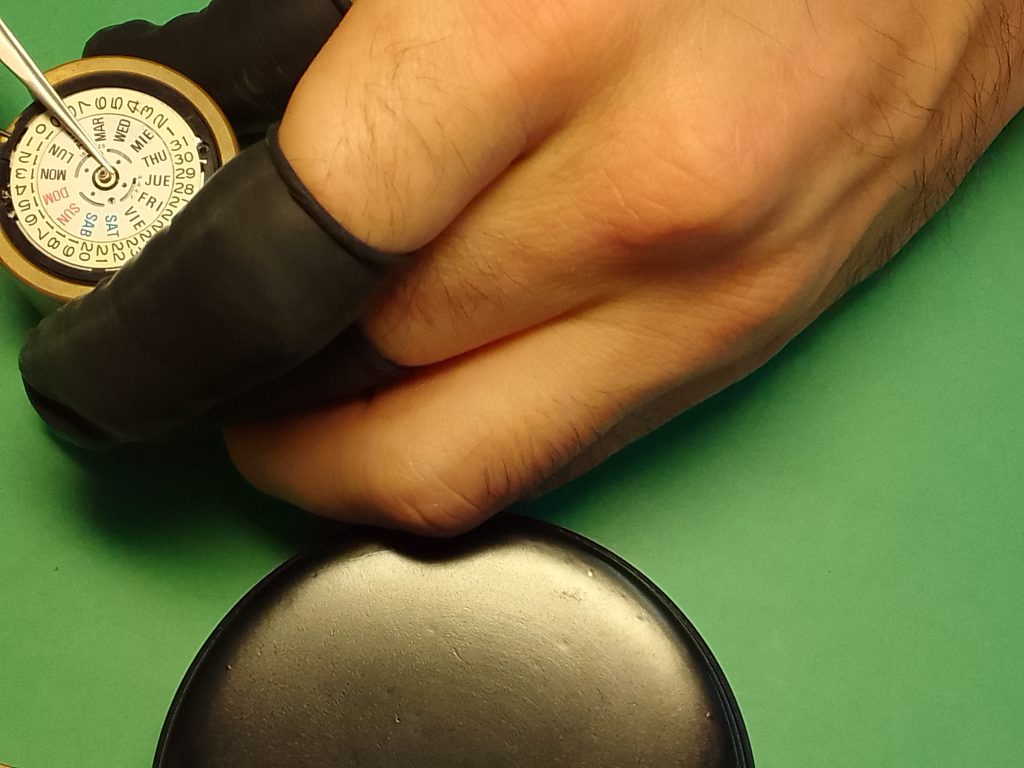
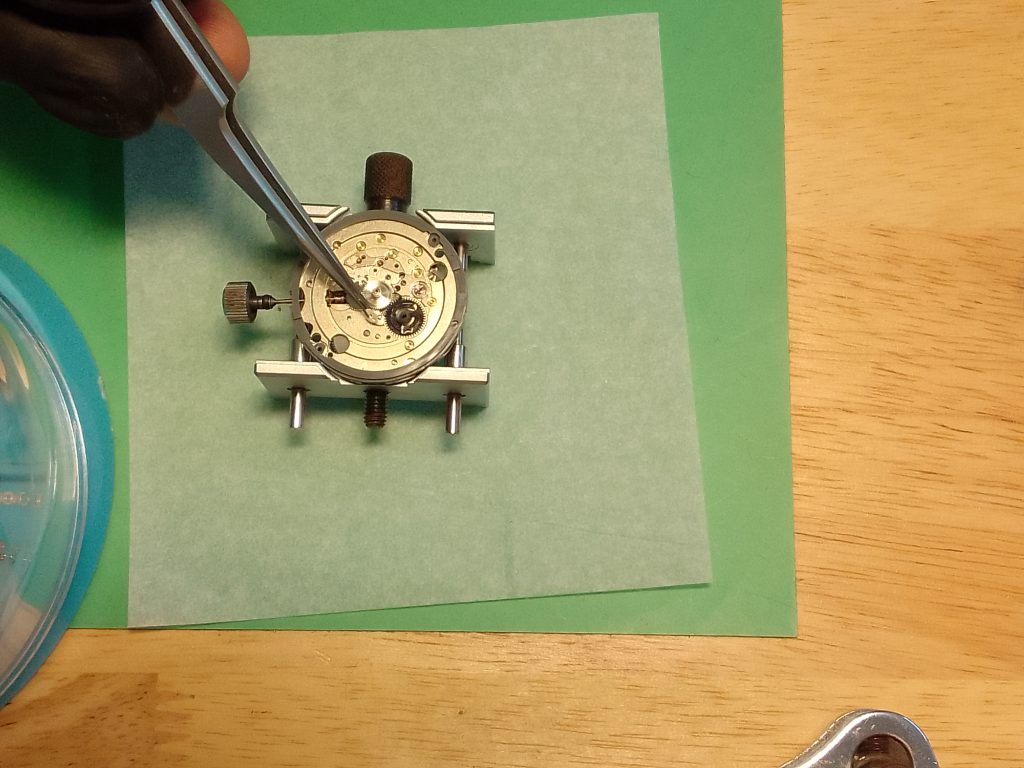
You may find the clip will want to twist away from you round and round the pinion. This may become frustrating and you will need to persevere here. If this is the case, apply a little pressure in the gap then check the rear side of the clip as you may have made a hole big enough to get the screwdriver in.
This clip can then be removed with a set of tweezers.
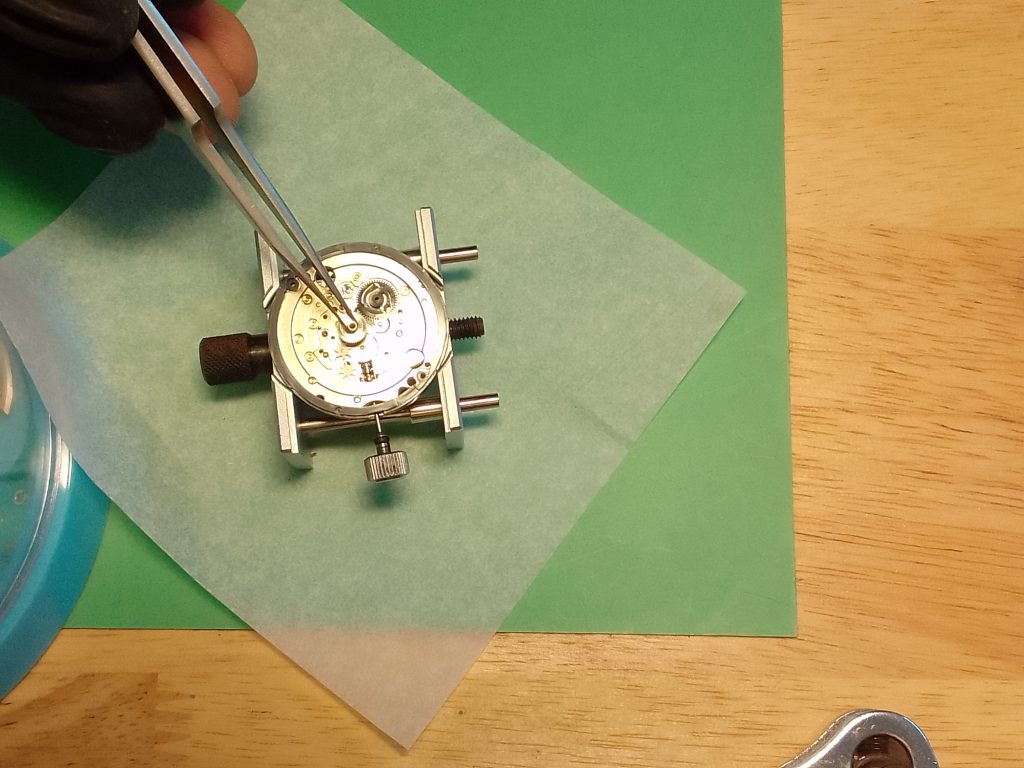
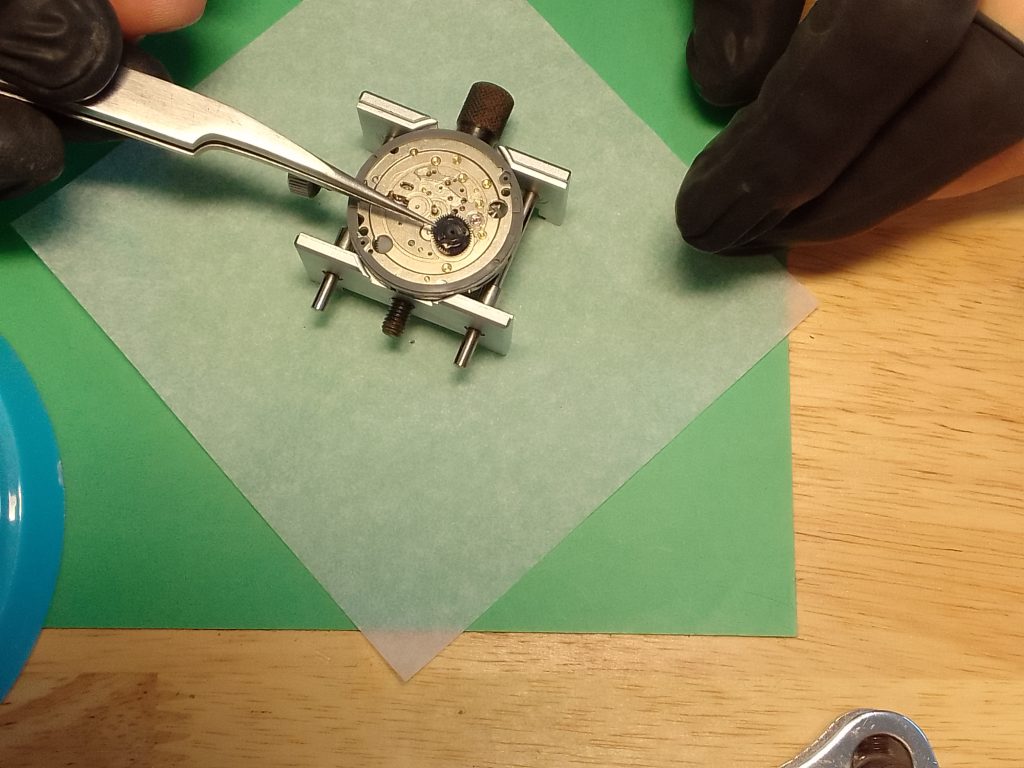
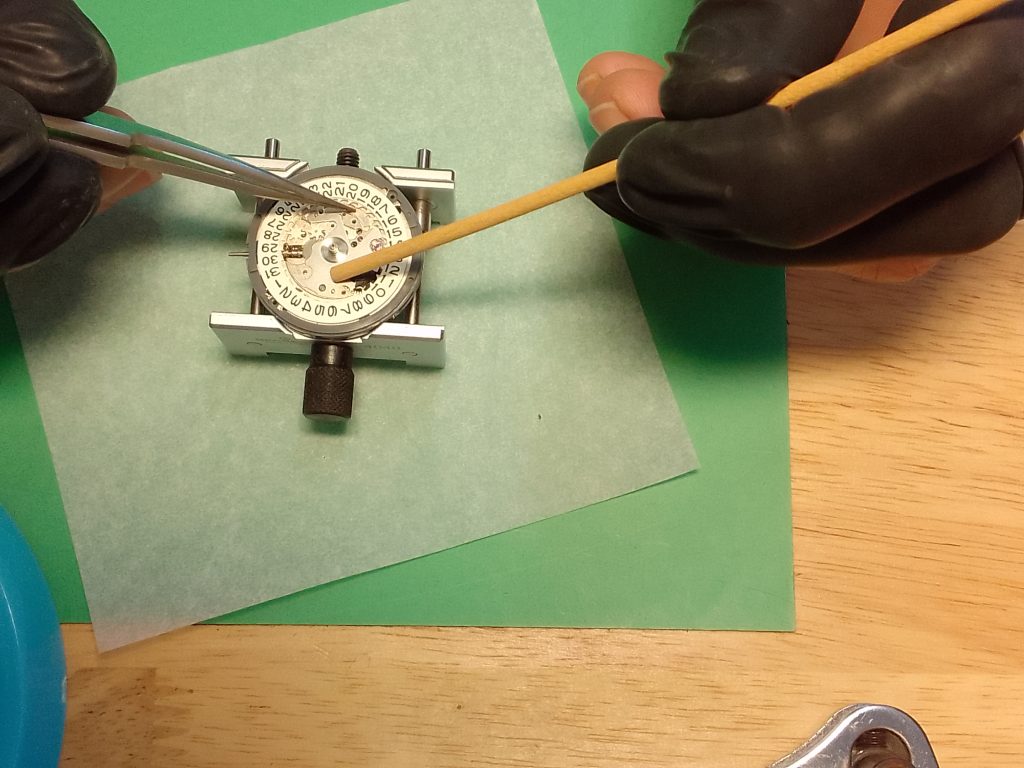
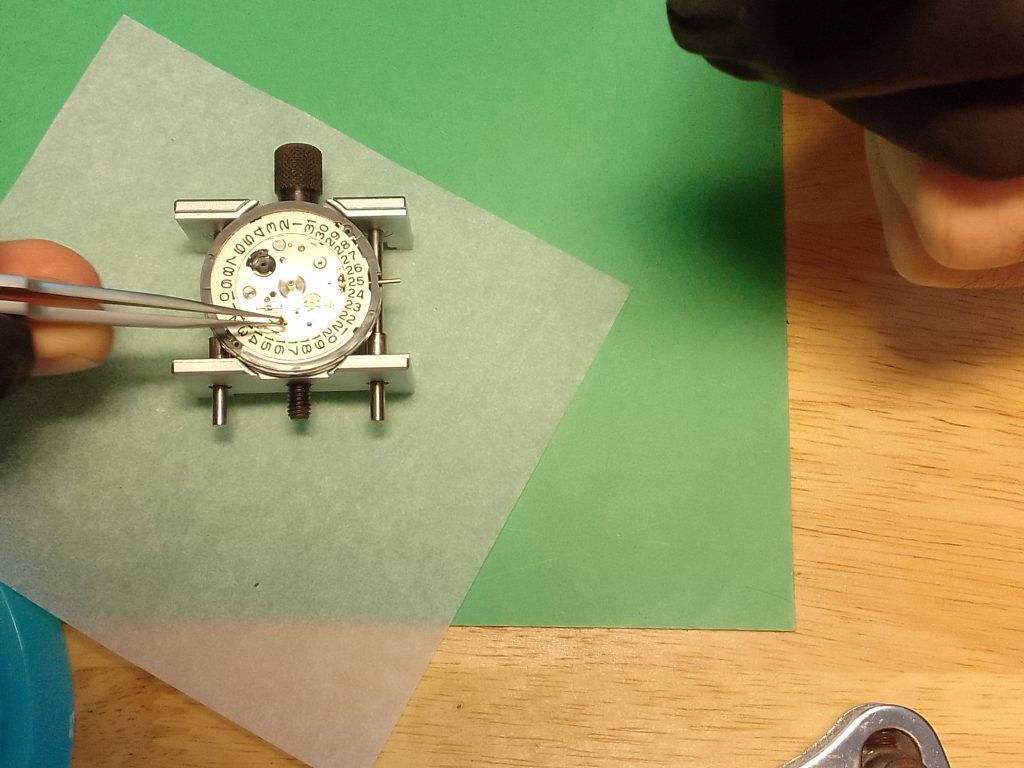
Removing the Day Disk
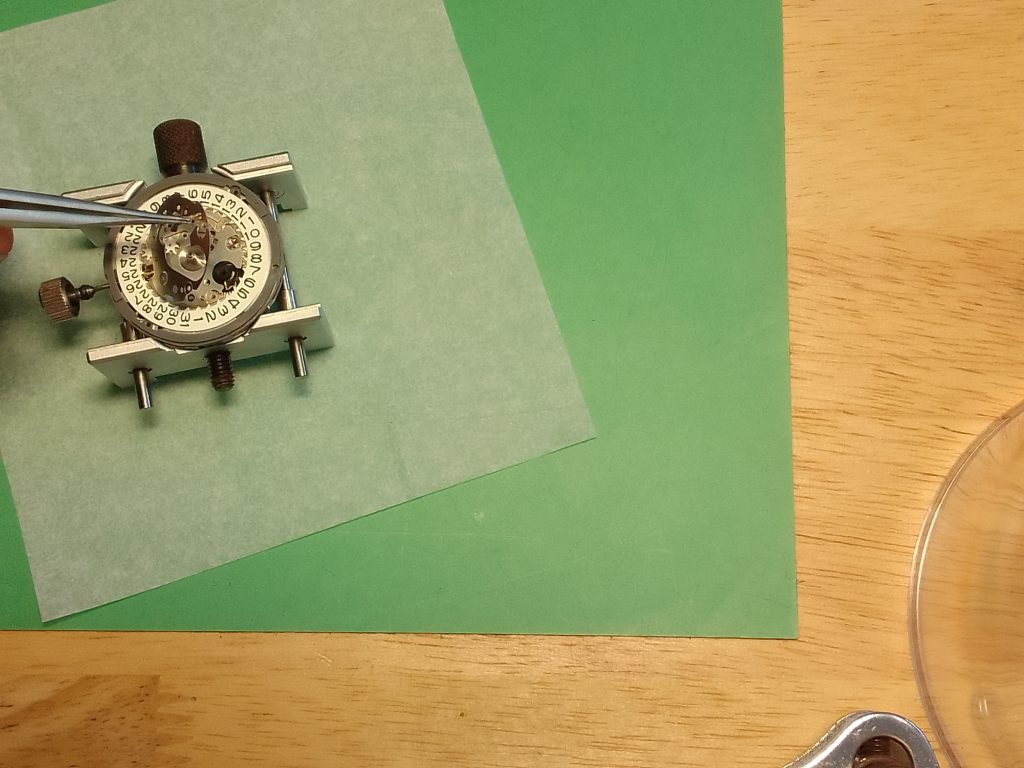
Next on the list is to remove the day wheel – this is easily done with some Rodico. Press some Rodico gently onto the date wheel and it will attach itself. You can then lift the wheel away. This can then be stored.

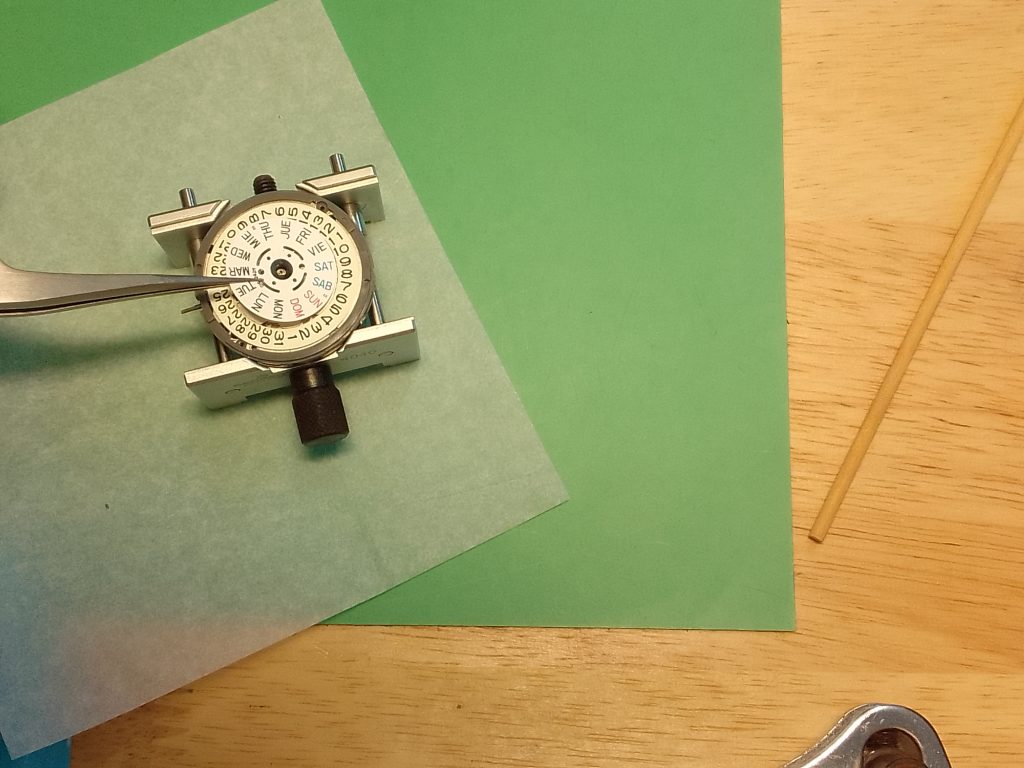
5KX – Day Disk Swap Ends here
With the day wheel now removed if you’re working on an 5KX, exchanging a broken 4R36 for an NH36, this is the part you need. You have completed this process of getting the day wheel, now you need to do the same again on the new movement. This is why it could be useful to have two movement holders and/or a selection of air tight containers so you can keep the parts of the two movements separate. Once you have retrieved the second day wheel, you can begin to re-assemble the movement, which can be found below or directly on the Day Disk NH36 quick guides section.
SKX Modders – Carry On
For those working on an SKX that need to remove the black movement holder, you will want to continue to remove the parts as follows.
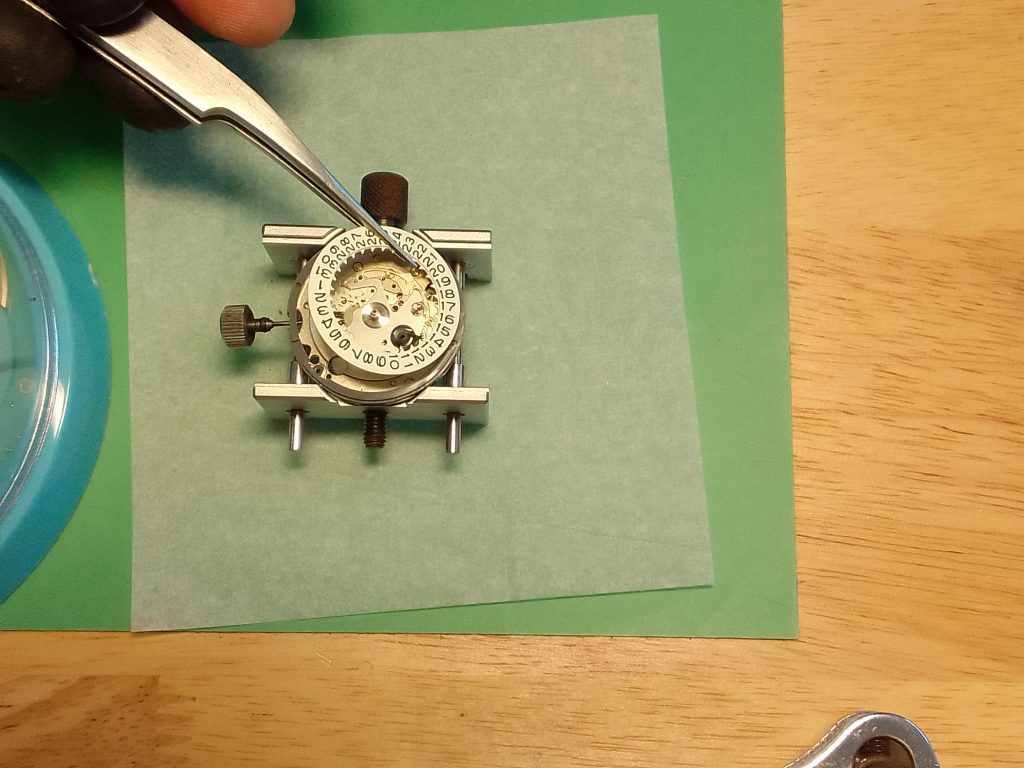
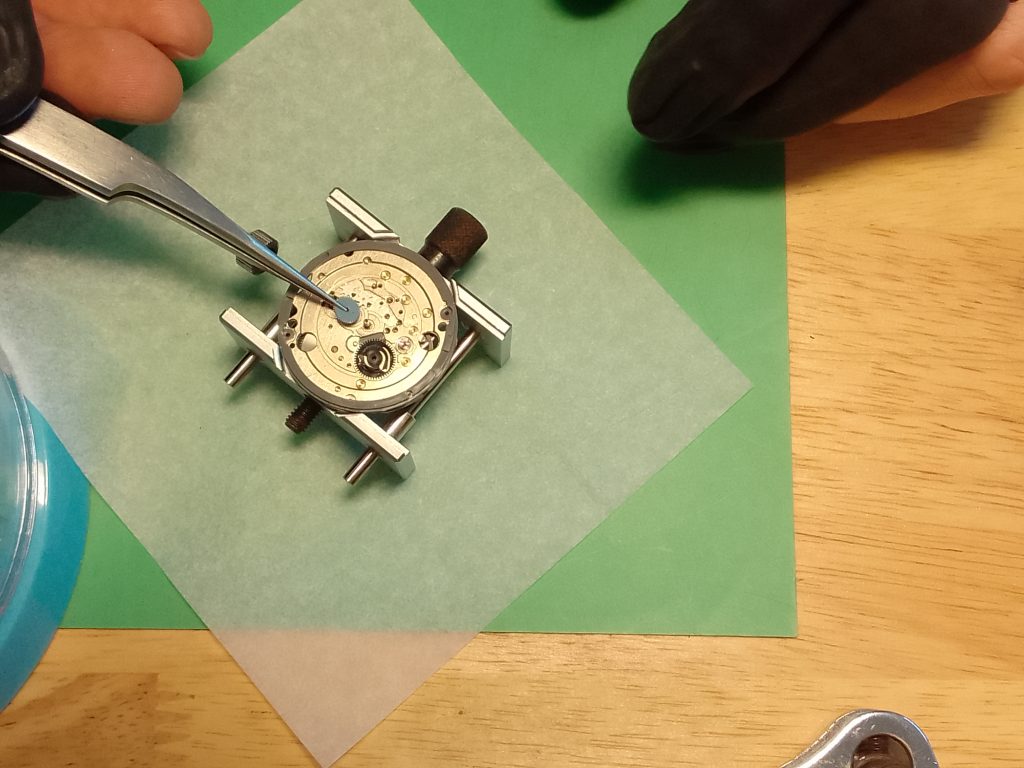
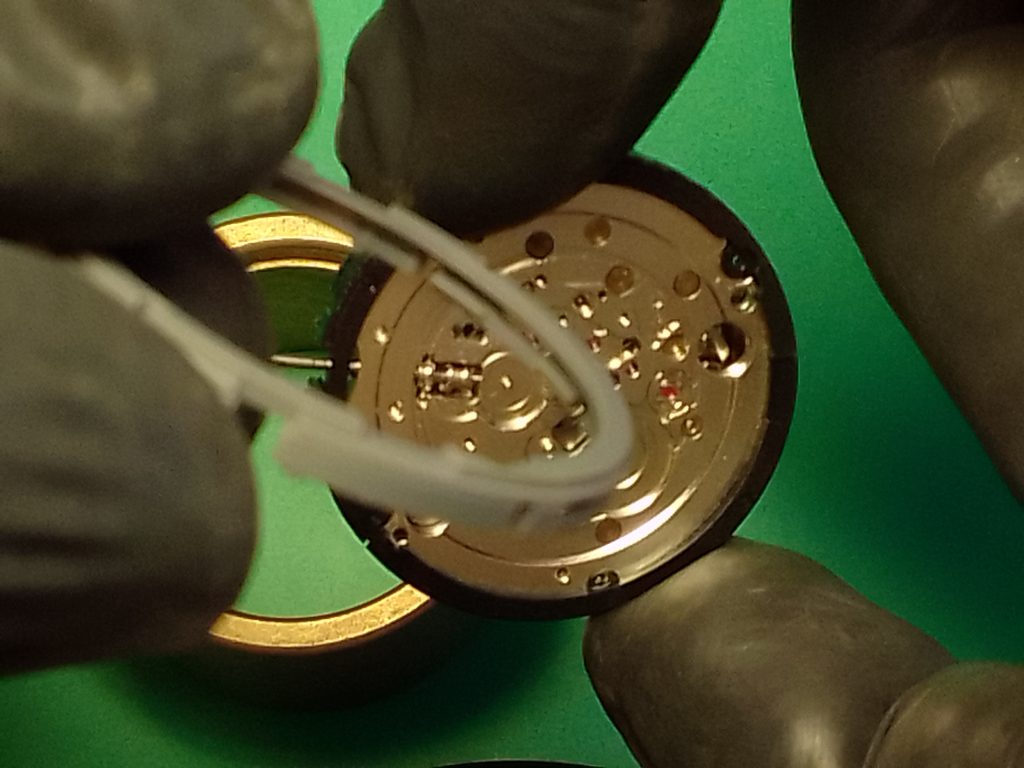
Looking back to the movement you have now exposed the date dial guard. This is a steel plate retained by four screws. There is also a small white wheel, this is called the intermediate wheel. You can start by using the tweezers to remove the intermediate wheel. You can do this later if you wish. Remember to store this somewhere safe.

Removing the Date Dial Guard Screws
The four screws can be removed with a screwdriver. It is yoru choice how to proceed with these four screws.
Remove the Date Dial Guard
Once the screws are safely stored away you can proceed to remove the date dial guard using the tweezers.
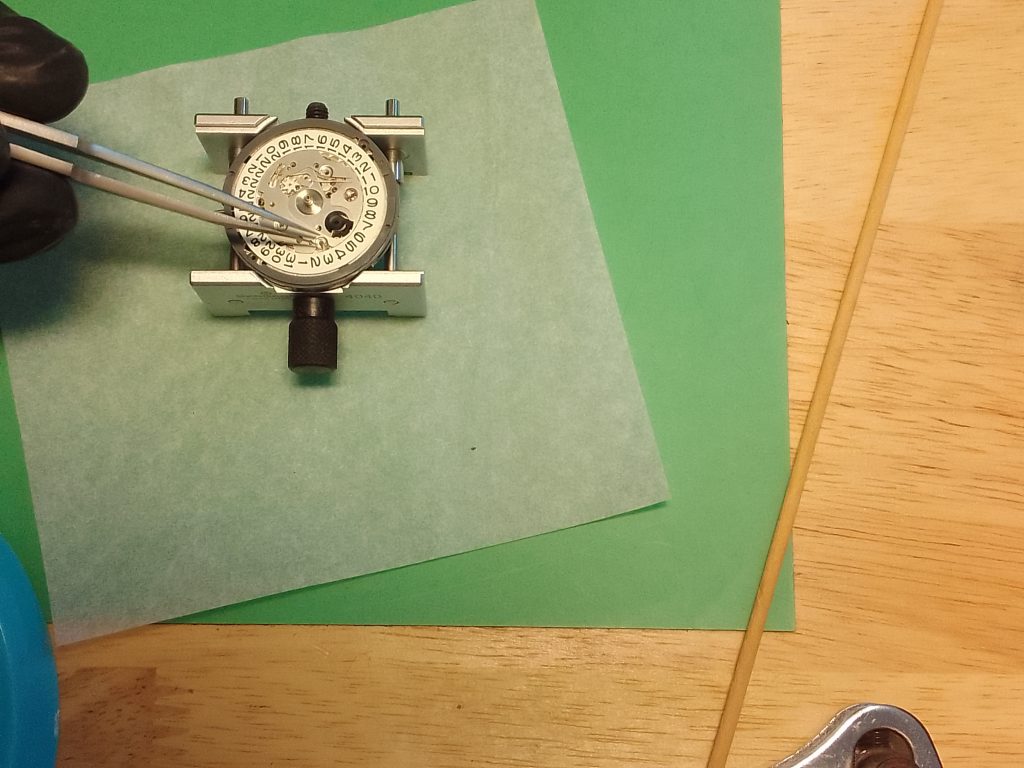
Removing the Date Disk
Next the date disk can be removed.
Removing the Date Jumper
The date jumper is the next, this is another steel plate that sits behind the date dial guard.
Removing the Intermediate Date Driving Wheel and Pinion.
Removing the Hour Wheel
Followed by the hour wheel.
Removing the Minute Wheel and Pinion
Minute wheel and pinion
Removing the Day Date Corrector Setting Transmission Wheel
Removing the Intermediate Wheel
Removing Day Date Driving Wheel
Removing the Movement Holder
Finally all the calender works are removed from the watch. The parts store away nicely with the lid. With fingers in gloves or cots, pick up the movement so the dial holding spacer, or what modders call the movement holder, can be removed.
The movement holder is easily removed as it’s plastic on steel, so if you give it a twist it should pop off. Try not to drop the movement in the process! You won’t be too bothered if it’s your broken movement, but you might not be so pleased if it’s the new one.
So, SKX modders will be pleased to hear they have got to the end of the first round, and now you have to go another. It is important to mention that taking breaks is necessary. So here may be a good place to take one before you start on the second movement. Don’t forget to use separate storage containers for each movement’s parts. Although you will learn many are interchangeable, you will want to keep a track of which day wheel is which.
Reassembling the Movement
So if you have made it this far, you should be looking at two movements, both in a relative pieces. You are probably thinking “oh my, this is some mess I have got myself into!” It will be fine!
A couple of basic points to remember when rebuilding the movement or movements:
- Inspect each part as you reassemble the movement for any dust.
- Tighten all the screws (a second pass over to check is recommended).
Fitting the New Movement Holder
If you are fitting the movement holder to your new movement, you will need to look over the movement holder to locate the the dial feet retaining holes. These will need to be located to the movement holder.

We replace all the parts that have been removed in the reverse order. Brief guide below.


Installing the movement parts in the following order;
- Day disk corrector setting transmission wheel,
- Date driving wheel,
- Minute wheel and pinion,
- Intermediate date driving wheel and pinion,
- Intermediate date wheel,
- Hour wheel.
Replacing the Date Wheel Jumper
Once you have successfully replaced the parts mention above, it’s time to replace the date jumper. This can be a little tricky. There are raised locating pins from the main plate of the movement. These are bronze, located around the five and eleven/twelve o’clock positions on the movement.
Replacing the Date Wheel
Setting the date wheel down with tweezers, if you have correctly located this, the next part should be easy. It is worth having some pegwood in one hand. This will apply pressure down on the date jumper. With the other hand you can use a screwdriver or tweezers to set the date jumper lever. The date wheel should drop into position and locate itself to the closest date setting on the date wheel.
Replacing the Date Dial Guard
Now the date dial guard can be placed into position, and located to the same two locating pins as the date jumper. When installing this be sure to not knock anything out of place.

Replacing the Screws for the Date Dial Guard
Once you have positioned this successfully, you can use the tweezers to replace the screws which retain the plate. It is worth passing over the screws a second time to ensure they are locked down. You can at this point check that the date wheel is functioning by using the crown, information on operation can be found here.
Replacing the Day Wheel
The day wheel can now be placed back onto the hour wheel. This will sit a little proud and will need to be located onto the day wheel jumper. You should be wearing gloves, so you can use your fingers to do this if you wish, but it is best done with pegwood. Turn the disk anti-clockwise and it should click into place.
Replacing the Clip
Finally, to lock the date wheel into position, there is the clip to be placed back on the hour wheel pinion. This can be done with tweezers. Gently place this over the hour wheel pinion. To secure the clip into the final locking position you can use two screwdrivers, or a pair of of tweezers. You will want to apply pressure down and the clip will lock in place.
Replacing the Rotor
Replacing the rotor is the final thing to do. This can be done easily with the movement in the watch case. If you are using a generic movement holder, as shown in the photos below, the movement may sit wonky in the holder once the rotor is installed. This can cause issues when fitting the dial and hands. For more information on dial or hands mods for the SKX or 5KX you can follow the links.

If you’ve found this guide helpful, be sure to comment below and explore our collection of other informative guides at seikomodder.com. We offer a wealth of resources to assist you in your modding journey. We’re here to support your passion for watch modification.
Useful Information
Sizes:
- With movement holder 29.36mm
- Without movement holder: 27.40mm
- Thickness: 5.32mm