Insert Mods SKX & 5KX – Bezel inserts are often coloured black, or red and blue, on stock SKX’s. They typically display numerals and markings. Inserts vary more on the 5KX range from blue, to black with red numerals, and so on. The stock SKX and 5KX are shipped with flat inserts, with that said they do actually slope down a little towards the crystal. You may want to change your insert for any number of reasons, to change the colour, or to add a dual time insert to work with an NH34 GMT movement. These inserts are easy to change and can add a whole lot of colour to your watch, or take it way completely. You may want to make your SKX or 5KX pay homage to a Swiss watch, which, in most cases will require a sloped bezel.
Inserts for Crystals
Flat Inserts
Flat inserts – are suitable for lots of crystals, although the best suited are crystals catagorised as such:
- Key: w or w/o = with or without
- Low Domed – w or w/o beveled edge
- Low Double Domed (DD) – w or w/o beveled edge
- Flat (like original) – w or w/o beveled edge
- Top Hat
Sloped Inserts
Sloped inserts – work best with:
- Raised Domed – w or w/o beveled edge
- Raised Double Domed (DD) – w or w/o beveled edge
- Raised Flat (like a sub)
- Top Hat
The reason sloped inserts are not really suited to the crystals suitable for flat bezels is because there will be a noticeable drop in height from the bezel insert to the top of the crystal. When working with a low dome or DD, the lines are all wrong. So best to avoid experimenting with this! For more information on the ‘beveled edge’ please check out the crystal section of this guide to modifying the SKX & 5KX.
Removing a Bezel Insert
Tools and Consumables – Insert Mods SKX & 5KX
- Solvent Remover
- Tissue
- Container
- Pegwood
- Small Knife or Razor Blade
There are a number of options for separating the insert from the bezel. For the Seiko SKX & 5KX mods it is fine to remove the bezel without the need to remove the insert. However, with some aftermarket cases that replicate these models, it is necessary to remove the insert before the bezel. This will become clear when you venture from modifying Seiko’s, to building custom watches, or modifying Swiss watches.
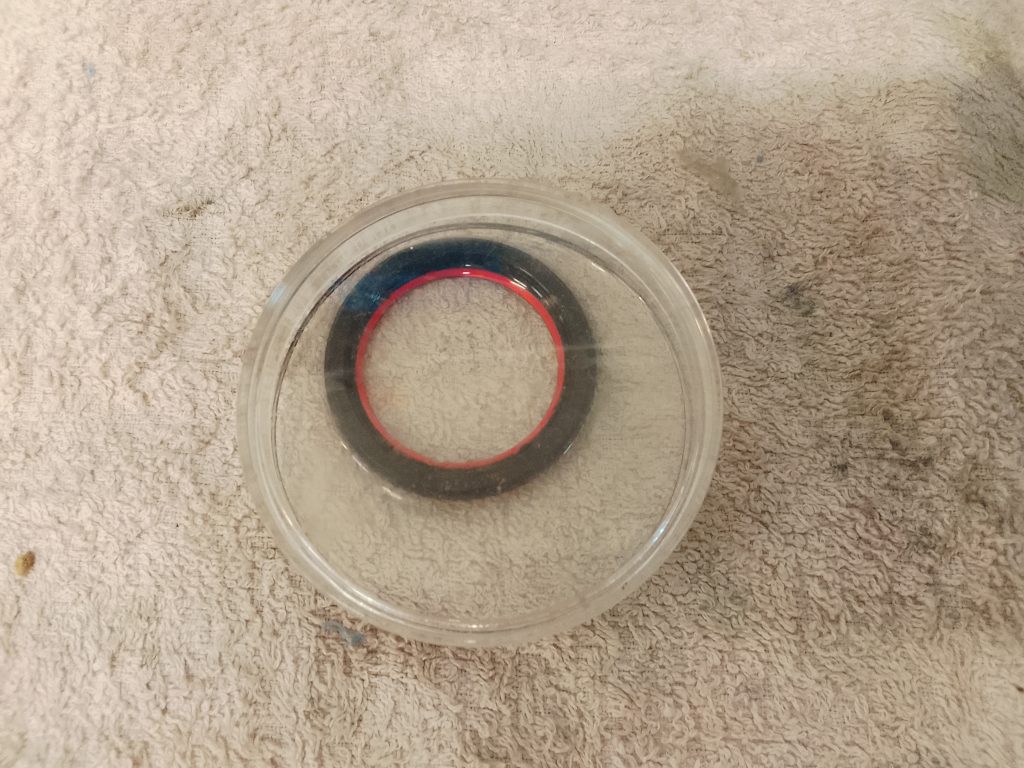
Soaking
The first option we at seikomodder.com recommend, is the method of soaking the insert in a solvent that will release the adhesive tape that retains the insert. This is a great option if you don’t intend on changing the bezel of your SKX or 5KX. With this method you reduce the risk of scratching the case, bezel, or other items. This is seikomodder.com’s preferred option as it limits the force required with sharp implements that could damage the case or components, and may also draw blood.
If the intention is to soak the whole case, removing the movement, dial, and hands is essential to mitigate potential damage caused by a faulty crystal gasket. Also seikomodder.com recommends replacing the case back, and place the crown into the water tight position before the case is submerged. You may wish to remove the bezel of the SKX or 5KX before it is submerged. How to do so can be found in the bezel section of the seikomodder.com guide to the SKX & 5KX.
This method uses a solvent to remove the adhesive tape that holds the insert in place. You can simply fill a small container with your chosen solvent. Enough to submerge the bezel insert laying face down in the container. Leave this for 20 minutes.
Upon returning to the insert and bezel, or case, that has been soaking, tissue will be require to wipe off the excess solvent. Once you have stopped the bezel dripping over your desk, use your thumb and forefingers to grip the bezel, and use your thumbs (on top of the bezel insert).


Now twist clockwise and anti-clockwise with your thumbs. The insert should have some movement in the bezel now. If the insert does not eventually break from its bed of adhesive after 10 -20 seconds of manipulation, then put it back into soak for an hour. It will surely then come away after that, if not try a different adhesive removing solvent or try the method below.
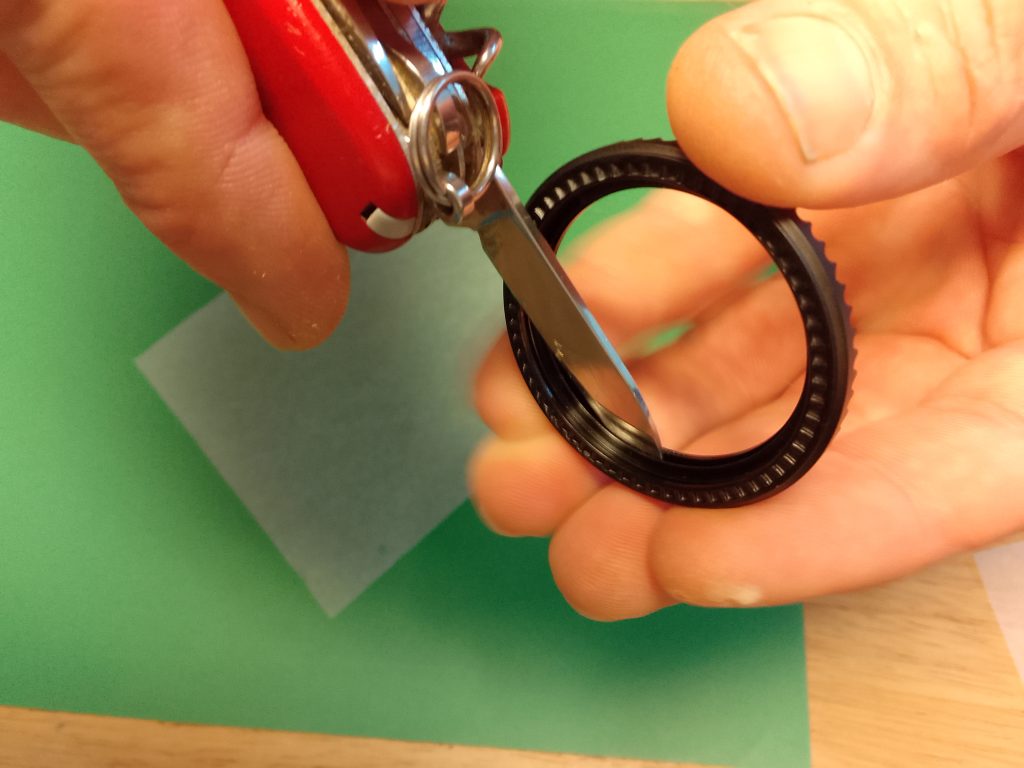
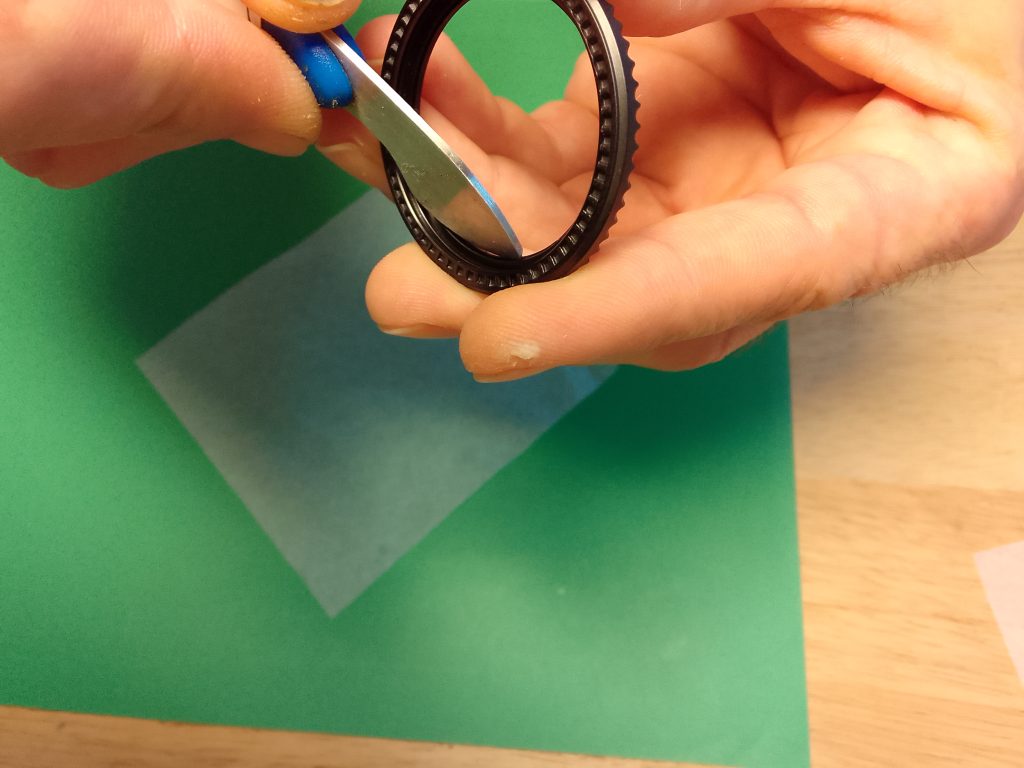
Forced Insert Removal
You will need to have removed your bezel from the watch as this will take place from the rear of the bezel. Removing the bezel can can be found in the bezel section of the guide.
Tools
- Blade
Once you have your bezel removed you will need your case back blade, or small Swiss army knife. The latter is better as it has thinner blade.
From the rear of the bezel, insert the blade into the gap between the bezel and insert. Once inserted it is best to work your way around the insert from the rear side with your chosen tool. The bezel insert should begin to move away the recess of the bezel. Finally after working your way around the the bezel from the rear the insert should fall away.


Cleaning
Finally, whichever method you have chosen you will need to clean off the excess adhesive left behind on the insert and bezel – that’s where the pegwood, or plastic scraper can be useful.
For those that chose the route of force, you may want to consider some solvent remover at this point as it makes light work of removing the excess and reduces the chance of scratching the bezel if using something sharp to remove the tape.
Scratching the bezel you say?
What does it matter, the insert sits on top of it, it will never been seen? This is true, but it didn’t look like that before you started. So, it shouldn’t after you’ve finished.


Fitting an Insert
There are two options for this. One is to attach the adhesive to the bezel, the other to attach the tape to the insert. Whichever you are most comfortable with. The process is the same, the difference is where the tape ends up. You may find fitting the tape to the bezel is easiest as the recess of the bezel works as a guide.
Tools and Consumables
- Tweezers
- Pegwood
- Adhesive Dye Cut Bezel Tape
- Finger Cots
- Cleaner
Re-gluing to a clean surface is paramount when working with adhesives. Any contaminants can cause failures so, as with everything, preparation is key. Cleaning the bezel and the rear of the insert with alcohol or other suitable cleaner and leaving time to evaporate is recommended.
Attach Adhesive Tape onto Bezel
Fitting the adhesive tape to the bezel is the first option. You will need to remove the centre of the dye cut 3m double-sided adhesive tape. For the easy release of the centre excess, it is best to score the cut line the dye has cut to create a good separation. With tweezers remove the whole centre of sticker including the protective layer from the backing pad. Do this, while leaving the usable part in place with protection still intact. You can use your tweezers in one hand while you hold the backing paper down on the bench with the other.


Using the tweezers you can now lift away the remaining useable outer edge of the double-sided tape away with ease. Slowly is the best way to remove this without distorting the perfect circle left by the dye.


Once you are happy with the position, you can apply pressure with your pegwood or chosen tool to get the adhesive to adhere well.


Attaching the Insert
The final part to this process is to fit the insert into the recess of the bezel. This is where you will need to starting thinking about alignment. It may be best to fit the bezel insert to the watch once you have re-cased everything and you are satisfied with your alignment of the dial and chapter ring.
By doing this you will be sure to get the correct alignment all the way from the dial through the chapter ring and onto the bezel insert. For attaching a bezel back to the watch case – please refer to the bezel section of the guide.
If the modified SKX is fitted without markers on the chapter ring, the dial, hands and movements will need to be cased to align the insert. If you have markers, and you are confident you nailed the alignment, you can proceed with setting the bezel. Once you have your bezel attached and you have cased your watch, you are ready to remove the protective layer of the adhesive tape.


Using two hands the insert can be placed as close to centre as possible using the twelve o’clock marker as a guide. Sloping the insert slightly towards the twelve o’clock position may help your aligning ability. If you place the insert, lightly, as close to centre as possible there is room for a little tease of the insert into the position you want. You will then need to apply some pressure down to create a good adhesion between the insert and the bezel.


If you are miles out, it is recommended that you remove the insert before the adhesive has a chance to stick too well! This is one of the very fiddly parts of modding, aspiring Seiko modders are encouraged to try, try again. This again falls to practice and patience.
If you’ve found this guide helpful, be sure to explore our collection of other informative guides at seikomodder.com. We offer a wealth of resources to assist you in your modding journey. We’re here to support your passion for watch modification.
Useful Information
Bezel Insert Size:
- 38mm (OD), 31.5mm (ID)
Replacement OEM Insert:
- For the SKX is sold as a pair with the bezel.
- The part number is: 8601-469B. (Pepsi).
Procuring a Seiko 5KX
Seiko have lots of options in the 5KX range a link to the collection can be found here.