Are you considering building your own Custom Sub Homage? Building the custom homage can be easy with seikomodder.com. Let us assist you with step-by-step instructions for assembling your own unique wristwatch using pre-configured cases. This is particularly beneficial for newcomers, as it necessitates only a limited selection of tools and these case sets are priced competitively. If you’d like to learn more about the steps in this seikomodder.com quick guide, follow the links for further details. A review of the products used in this guide follows step by step instructions.
If you are used to modifying stock Seiko watches there will be a few differences to note with the production of this custom watch.
- Case back is sealed with a special key – a rubber ball is useful.
- Additional movement holder/spacer required for 3mm Seiko movement spacer
How to Guide – The Custom Sub Homage
Tools and Consumables
- Springbar Tool
- Hand Press
- Pliers
- Tweezers
- Screwdrivers
- Case Cushion
- Movement Holder
- Air Duster
- Case Back Tool – Rubber Ball
Optional Tools and Consumables
- Bracelet Vice
- Hammer
- Rodico
- Watchmaker’s Paper
- Storage Containers
- Loctite
- Calipers/Verniers/Ruler
- Rotary Tool or File
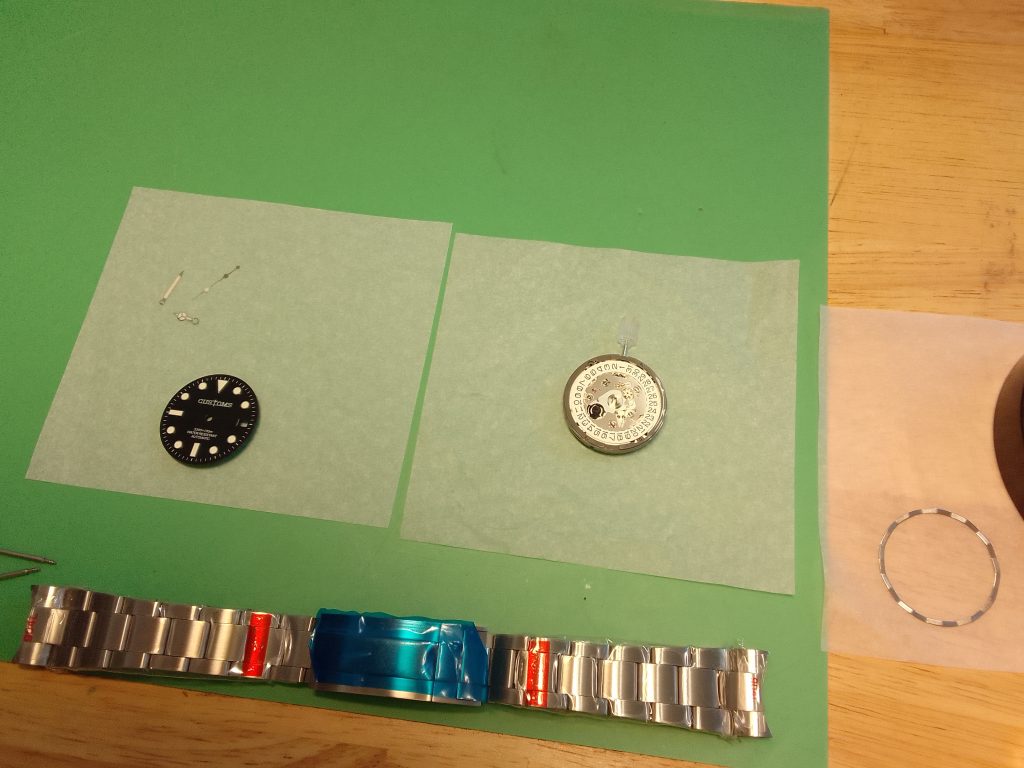
Preparation is key to most things. Getting all the components laid out on your workspace ready, is a good idea. These cases come ready assembled with the bracelet fitted. So, the first thing remove is the bracelet.
Remove the Bracelet – Custom Sub Homage
Turn over the Custom Sub Homage so you are looking at the rear of the sub case. Where the bracelet is attached between the lugs, insert the tool on the springbar, close to the case and pull the spring bar away from the case. You may need to pull or push the end link gently with your other hand that is steadying the watch. This will reduce the risk of the spring bar re-engaging with the hole which it has just been removed from, while you remove the springbar from the other side. Once the end link is free from the watch you can remove the pin. Seikomodder.com suggests doing this because when the watch is turned it may fall out and roll off of the bench.
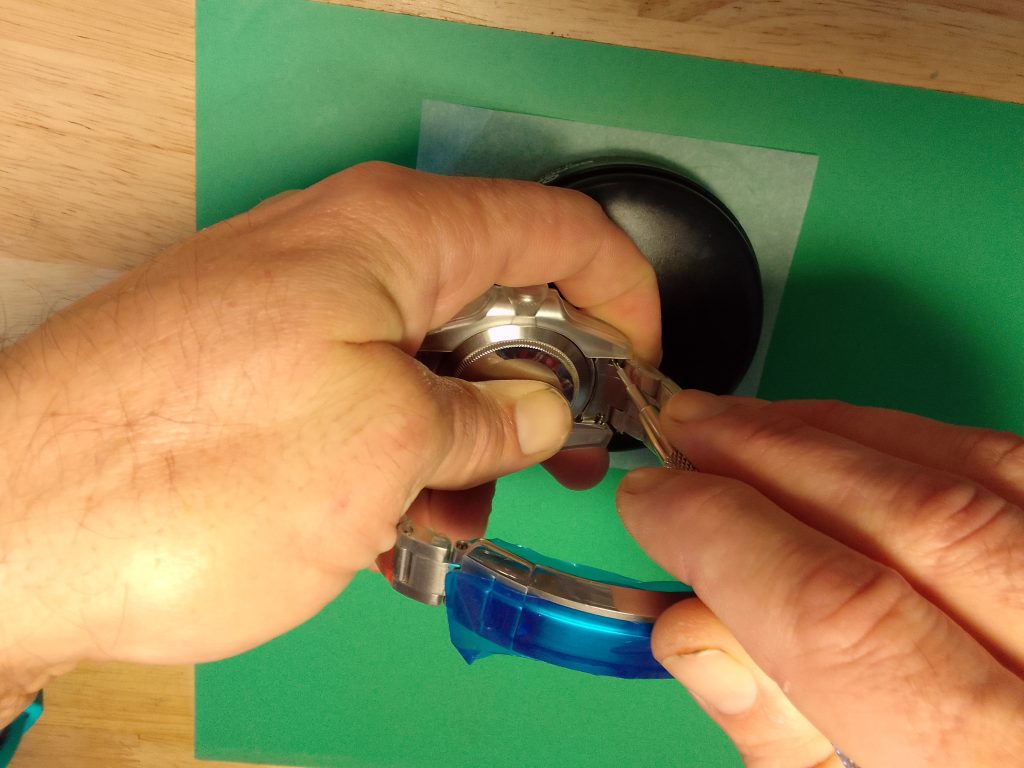
This is repeated again to remove the other springbar. Once the bracelet is separated from the watch, store the pins somewhere safe and set the case and bracelet aside.
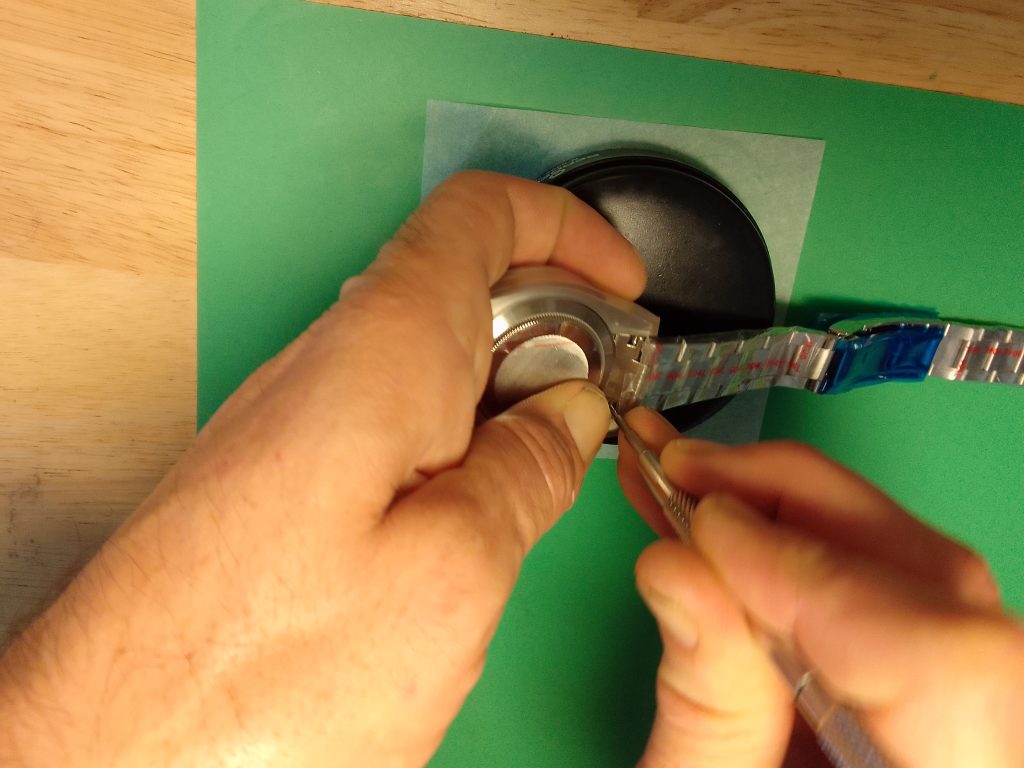
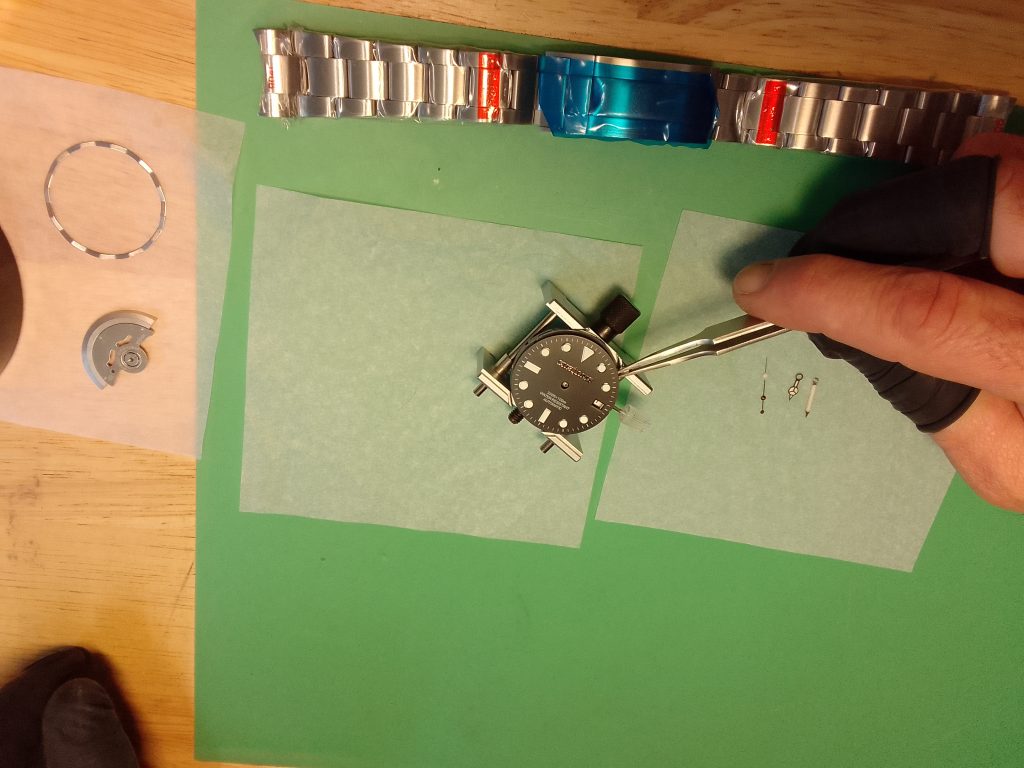
Attaching the Dial – Custom Sub Homage
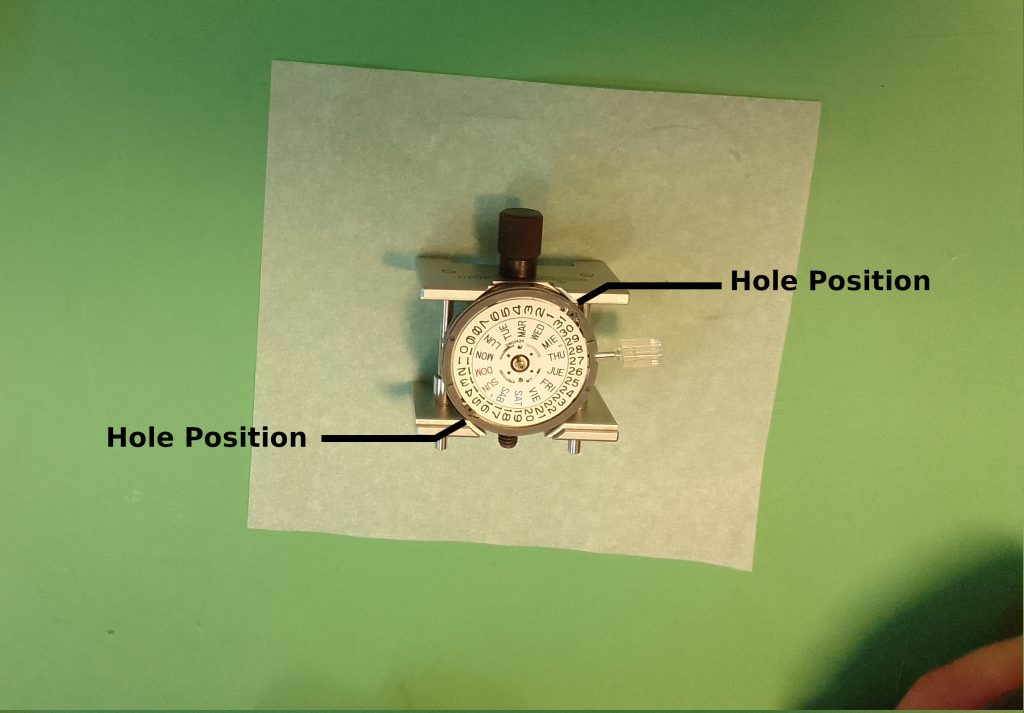
The dial for this Custom Sub Homage was fitted with a number of extra dial feet. It may be necessary to remove excess dial feet if there are more than required. More information on this can be found in the guide here.
To apply your new dial to a three o’clock crown case
Retain the dial feet at 1:45 & 7:45 which is opposite. (approximate times).
The movement will need to be placed in a movement holder. Using the tweezers the custom sub homage dial can then be aligned with the crown at the three o’clock position and the centre hole of the dial with the pinion. Using tweezers to hold the dial by a dial foot is ideal for positioning. With a gentle shake the dial should find the holes in the black or grey movement holder. The dial can be pressed into position when you are happy the dial feet are located in the holes of the movement spacer.
Change the Date
This Custom Sub Homage features a NH35 movement, this includes a date complication. Before the hands can be fitted to the watch, the date will need to be changed on the movement. It is important to stop as close to the date clicking over as possible. This will provide the best possible odds on the date changing at midnight precisely, or very close to it. There are movement operating instructions located here at seikomodder.com.
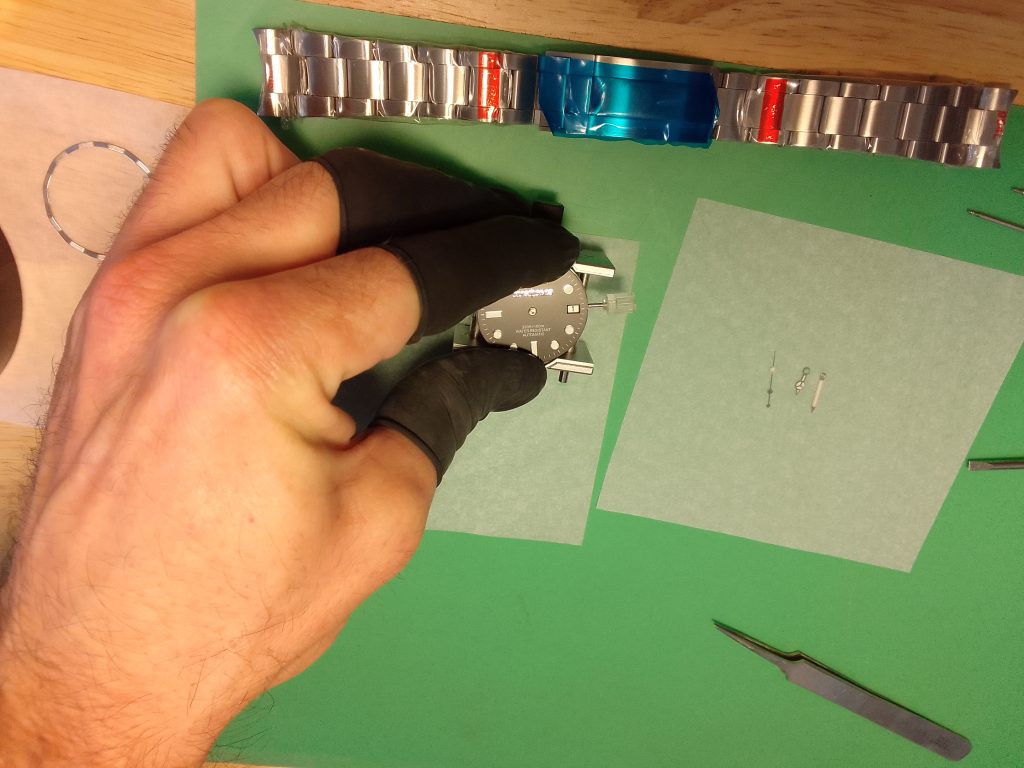
Fitting the Hands – Custom Santos Homage
Preparation for fitting the hands can make the job a little easier. Laying out the tools and components you require will help as you progress to becoming a proficient Seiko modder. This is one of the hardest parts of assembling your custom watch. Seikomodder.com recommends that you practice on an old watch, or have a spare set of hands, or two, as you may scratch or bend the hands. If you need to remove the hands details can be found here.
Hour Hand
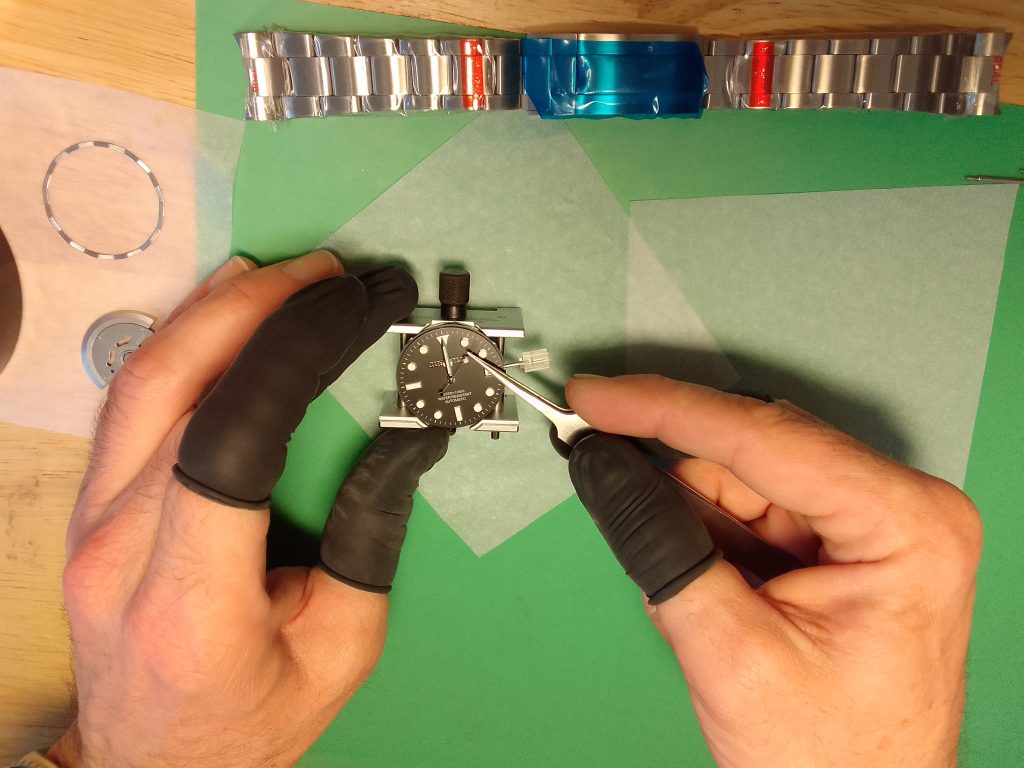
Pick up the hour hand with the tweezers. This needs to be placed over the pinion. When positioning the hour hand on the custom sub homage, the direction of the hand should be pointing to twelve o’clock. Once the hand is successfully resting on the pinion in the centre of the dial, the tweezers can be removed. Micro adjustments can be made by gently ‘nudging’ the hand with a hand press to get the perfect alignment.
Before the hand is pressed into position, you may want to clean your hand press in some Rodico. Finally, press the hand into position and check the side profile that the hand is seated parallel to the dial. This will limit the hands fouling after installation.


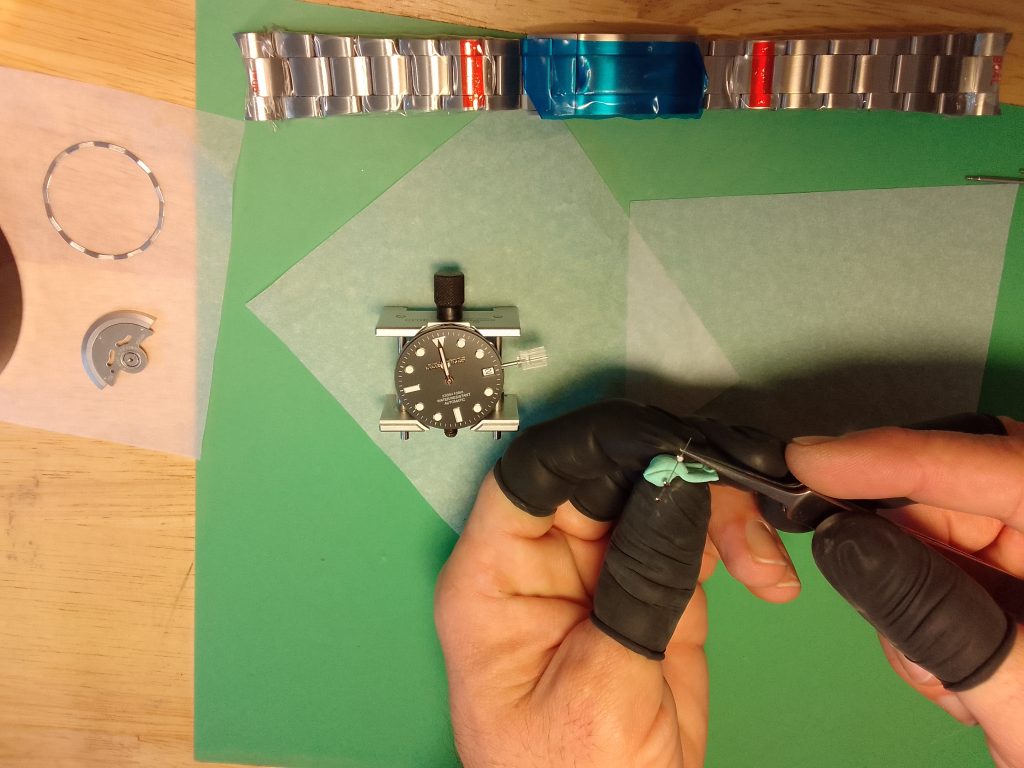
Minute Hand
To fit the minute hand, the same process as the hour hand is followed. Remember seikomodder.com recommends to clean the end of you hand press in some Rodico before the hand is pressed into position. Some Seiko modders like to wind the hour hand on to the six o’clock position to give them space when fitting the minute hand.


Second Hand
The most challenging part of setting the hands can be the second hand. The process is the same, take the second hand in the tweezers, position this over the centre pinion and press. You may wish to lift the hand with Rodico before it is taken in hand with the tweezers if you struggle to pick it up.
If it is a struggle to position and press at the same time, resting the second hand on the pinion and then pressing the hand is also an option. Be careful you don’t miss the pinion as the hand can slip down the side and rest in between this and the minute wheel. Once this is successfully attached you can check the alignment for the final time.

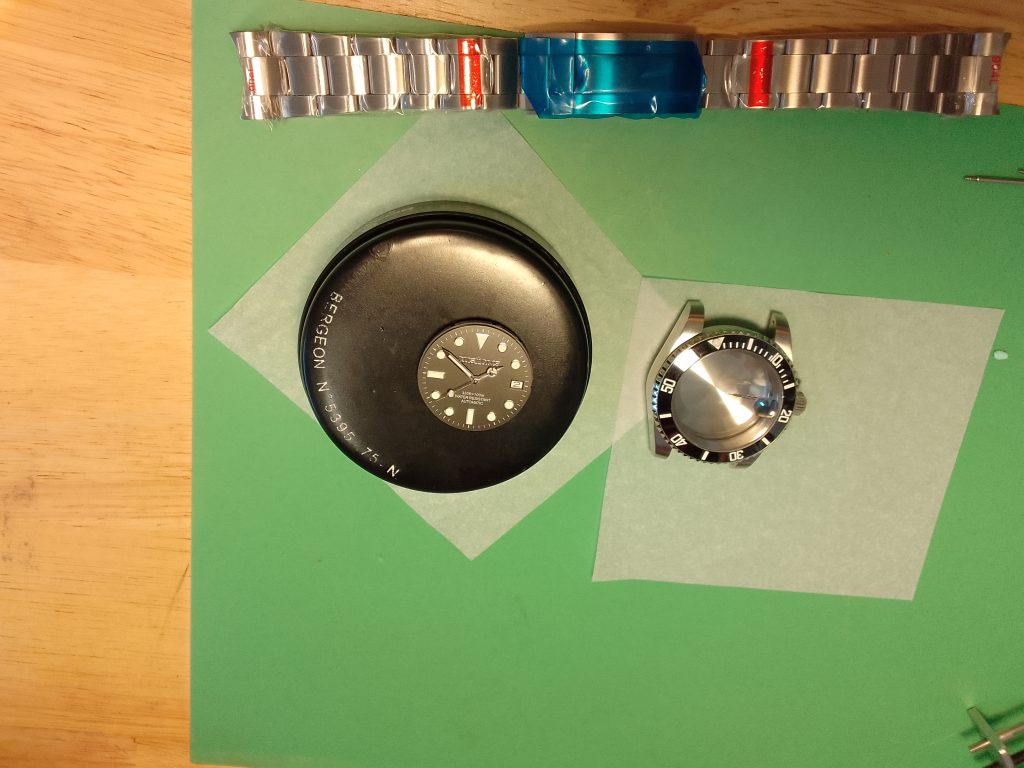
Casing the Movement, Dial and Hands
Before the movement can fit inside the custom sub homage case, the temporary crown and stem will need to be removed from the movement. Setting the dial, movement, and hands face down in a vice/holder will free both hands for this task. Once removal of the crown is complete, the movement, dial, and hands can be set on a case cushion and given a dust off, removing any stubborn particles with Rodico.


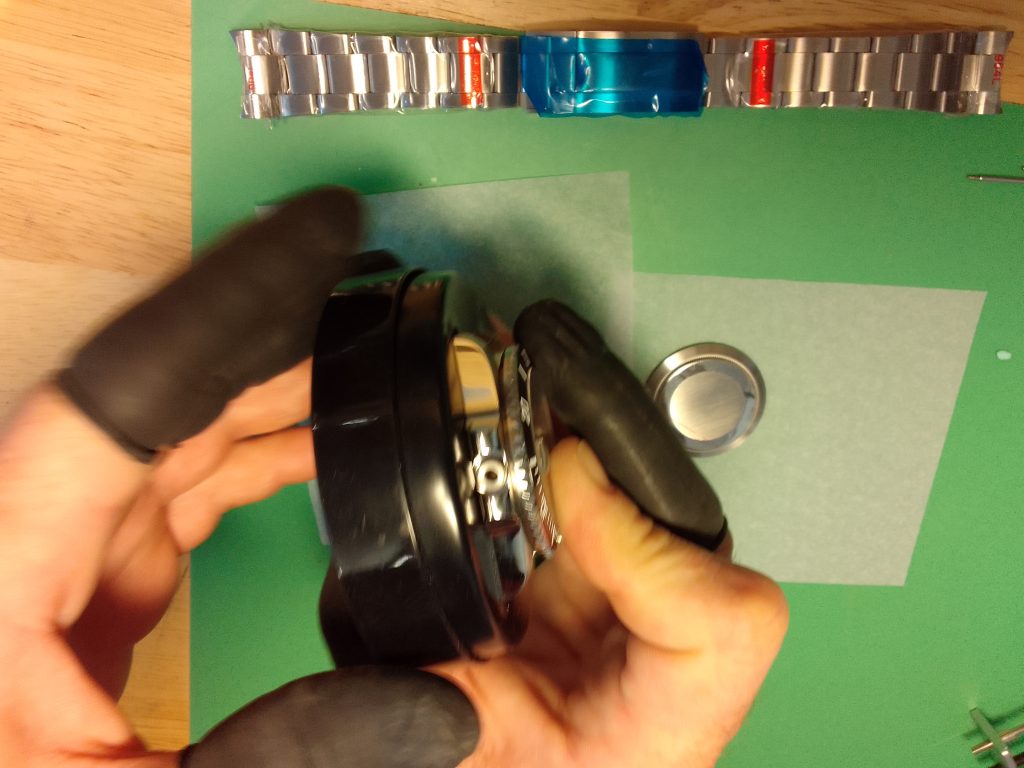
The Custom Sub Homage case can be air dusted and inspected for any particles. Once satisfied the case and dial are dust free, the case can be laid over the dial, movement and hands. This case’s internal dimensions are pretty snug to the movement spacer. For best fitting, tilting the case down to the three o’clock position is best as this will engage the crown tube first, making the rest of the process go smoothly. This should be the final inspection for dust. If you need to remove and dust it is best to do it now. If it is ‘all clear’ the watch can now be flipped over on the case cushion.

Fitting the Crown and Stem
The crown and stem can be joined together with your fingers, use pliers to create a firm bond after you have secured this ‘finger tight”.

The stem can be inserted into the movement, this may require a little turn to lock into the keyless works. Using your chosen measuring device, the excess can be noted and the crown and stem removed.


The stem can be separated from the crown and marked with the length to be removed. This can be done by eye if you wish. The stem can then be cut and reattached to the stem with loctite, although further testing maybe require to achieve the perfect length stem before the loctite is applied.


Once the stem is the optimum length, the final fitting can be made. The crown can then be pushed into the water tight position. The crown may require a little twist to fully engage with the movement.
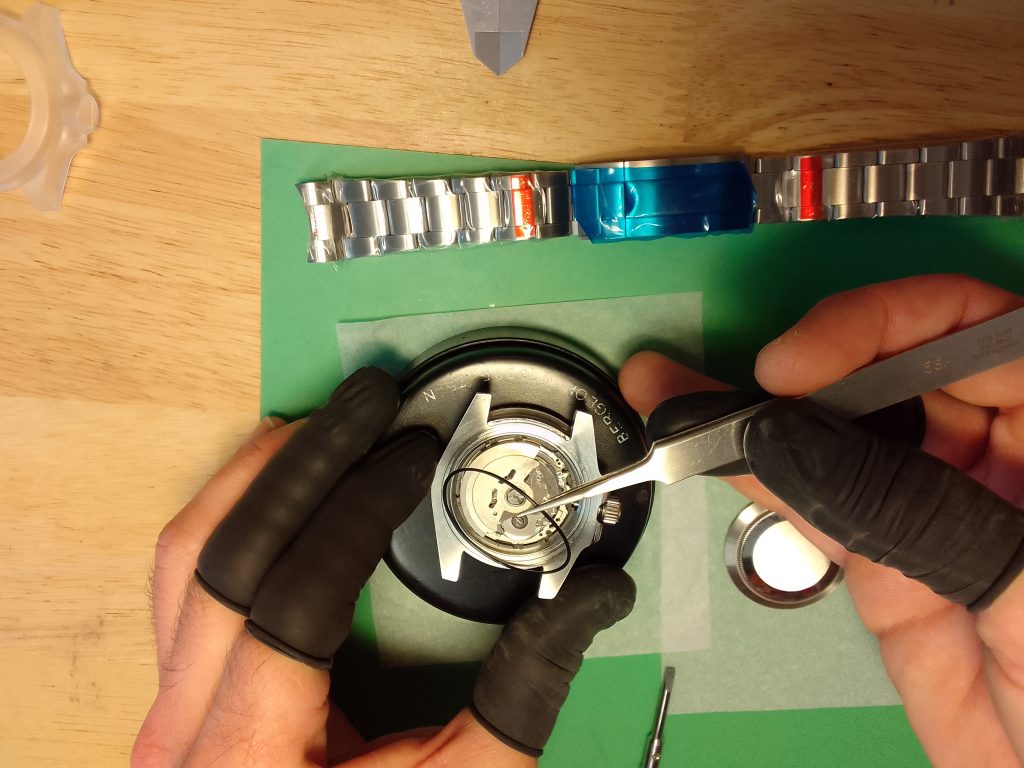
Fitting the Rotor
If you removed the rotor, you may wish to replace this now. It is the done in reverse of the removal. Checking the rotation to ensure the rotor is not fouling the pawl lever. You may feel a click as the rotor aligns.


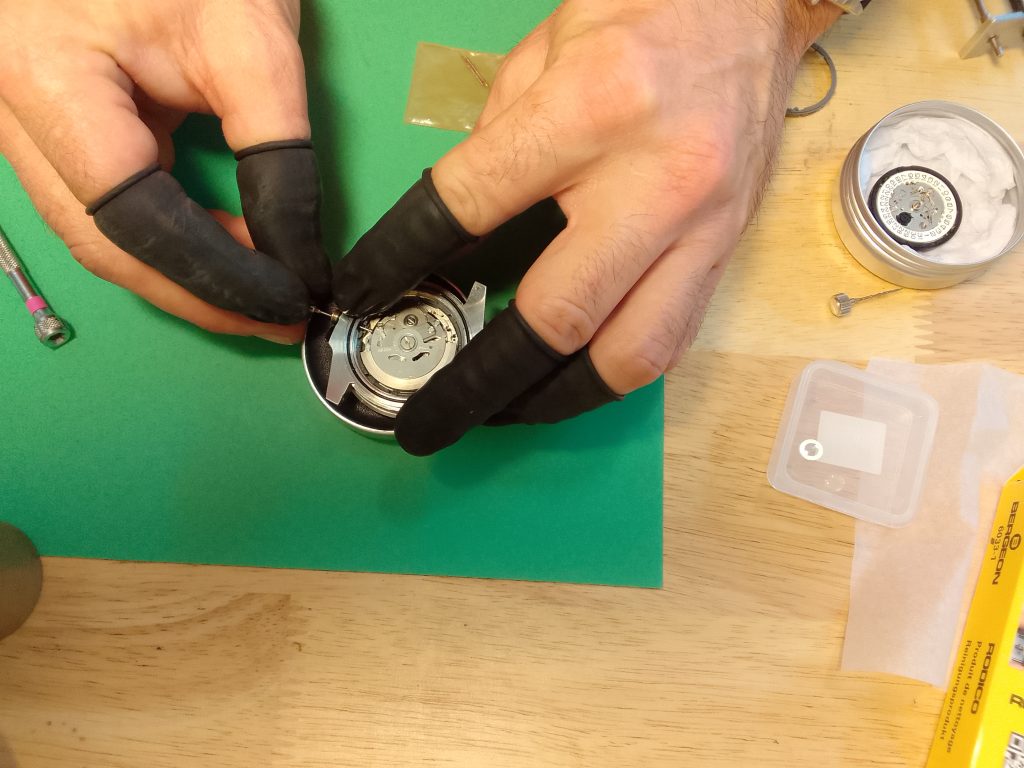
Sealing the Case
There should be a gasket supplied with the case. This is an o-ring, usually around 0.9mm to 1mm thick. You may wish to grease the gasket before installation. Lay this into position on the case with tweezers. Check that the gasket is aligned in the groove of the case. The case back can then be applied turned to engage the thread.


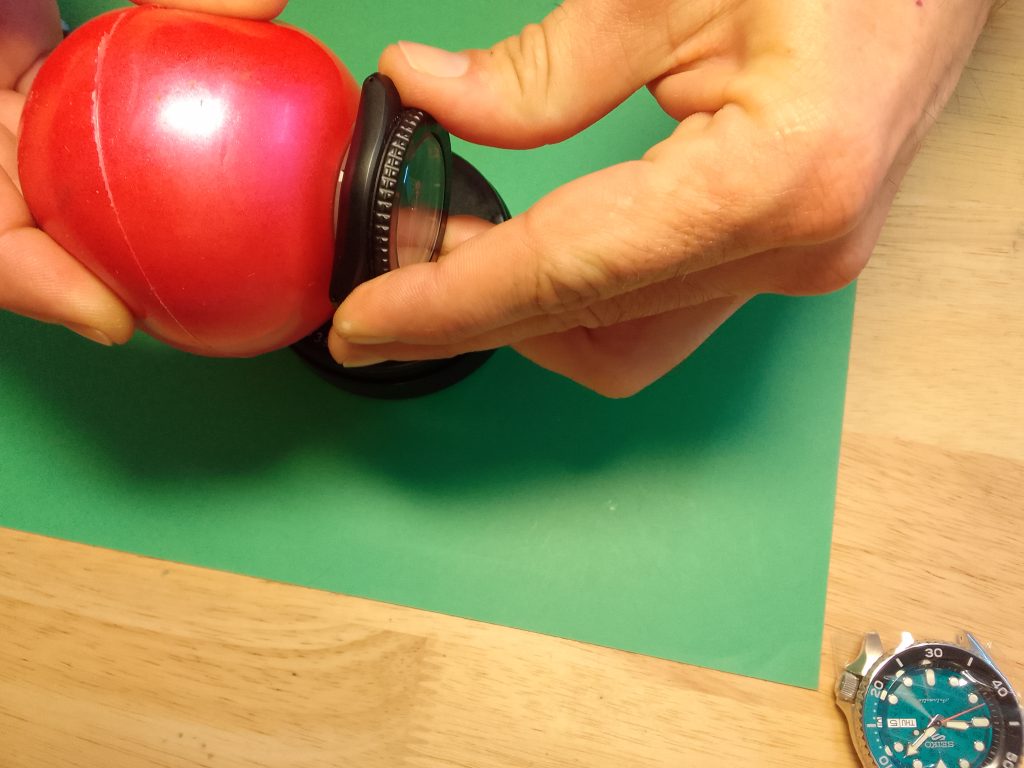
Once the case back is finger tight, you will want to secure the case back with a case back tool or a rubber ball. Seikomodder.com recommend a rubber ball for new Seiko modders as it is the cheapest, most versatile option. The specialist keys and bench mounted case back opener or handbar (as photographed below) are expensive if you do not intend to use the whole set. These keys can be purchased singularly but the handbar is often at an additional cost.


Attaching the Bracelet
The bracelet can be re-attached with the two springbars that were removed. Inserting the springbars in the bracelet is done by hand, or with tweezers. A springbar tool will be required to pull the pins back so the bracelet end link can lock into position between the lugs. The first side will be the easiest, the second will require you to hold the weight of the bracelet while the final resting position is achieved.

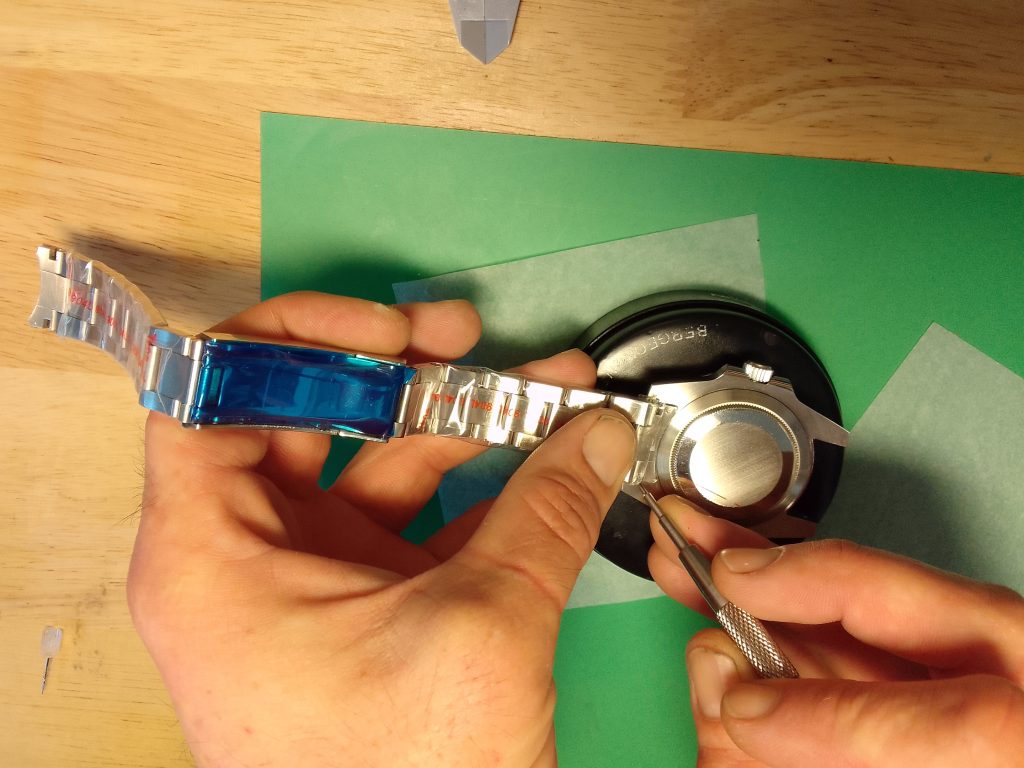

Seikomodder.com recommends inspecting both sides of the bracelet by giving a light tug to confirm the bracelet is locked into position.

Case Specifications
- Case diameter:40mm
- Case thickness:13.8mm
- Bracelet width:20mm
Water Resistance:100 metres - Movement: Japanese NH35 movement
- Case Material: 316L stainless steel case,
- Insert Material: Ceramic
- Crystal material: Sapphire
- Bracelet material: 316L stainless steel
Review – Custom Sub Homage Case
The Custom Sub Homage Case stands out as an exceptional value for money, impressing with its thoughtful assembly and high-quality components. Here’s a closer look at what makes this case a compelling choice:
Pros:
- Quality Components: The case boasts top-notch components, including a sapphire crystal and ceramic bezel inserts. These premium materials not only enhance the aesthetics but also provide remarkable durability, ensuring your timepiece stands the test of time.
- Smooth Case Closure: The case back and crown screw closed smoothly, demonstrating meticulous craftsmanship. This not only enhances the watch’s water resistance but also contributes to the overall user experience.
- Water Resistance: The case successfully passed a water resistance test, showcasing its ability to withstand water pressure up to 75 meters. This level of water resistance adds a layer of versatility, making it suitable for various settings and activities.
- Popular Design: The design of this case is undeniably popular, and for good reason. Its timeless aesthetics and functional features have made it a favorite among watch enthusiasts. Its widespread popularity likely contributes to its outstanding value for money.
- Sapphire and Ceramic: The use of sapphire crystal and ceramic bezel inserts not only elevates the aesthetics but also offers enhanced durability. These materials provide the extra shine and hard-wearing properties that many watch aficionados desire.
Cons:
- Bezel Rotary Action: While the bezel’s rotary action is relatively smooth and easy to operate, some users might find that there is a slight play between positions. It’s not as tight as one might expect, but it’s a minor concern compared to the case’s overall positive attributes.
In conclusion, the Custom Sub Homage Case is a remarkable choice for those seeking exceptional value for their money. With high-quality components, a popular design, and the added durability of sapphire and ceramic materials, this case offers the best bang for your buck. Its versatility, water resistance, and overall craftsmanship make it a compelling option for watch enthusiasts looking to create a lasting and impressive timepiece.
Buy the same products
The products used in this guide can be found on the following links –
- Steel – Case & Bracelet Set
- Bi-metal Bi-metal Effect – Case & Bracelet Set
If you’ve found this guide helpful, be sure to explore our collection of other informative guides at seikomodder.com. We offer a wealth of resources to assist you in your modding journey. We’re here to support your passion for watch modification.